
|
| How to Scan a File for Viruses and Malware in Power Automate |
| 5/11/2023 - Brian O'Neill |
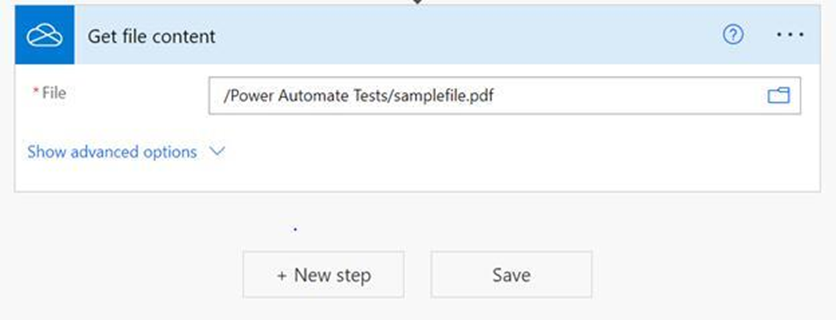
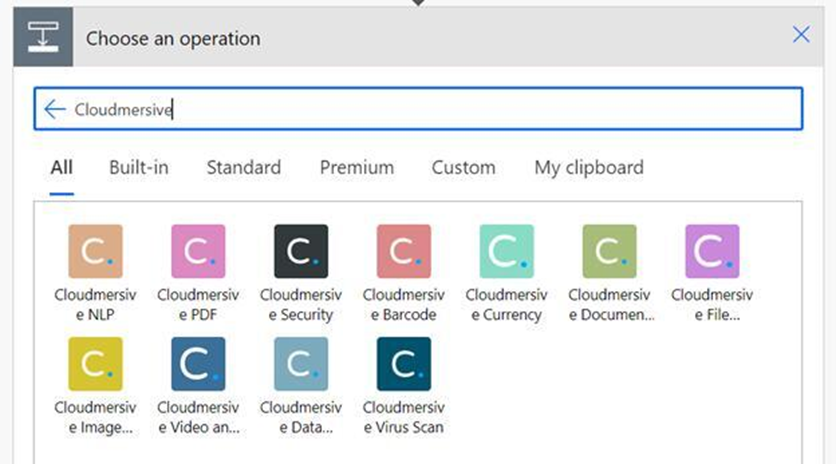
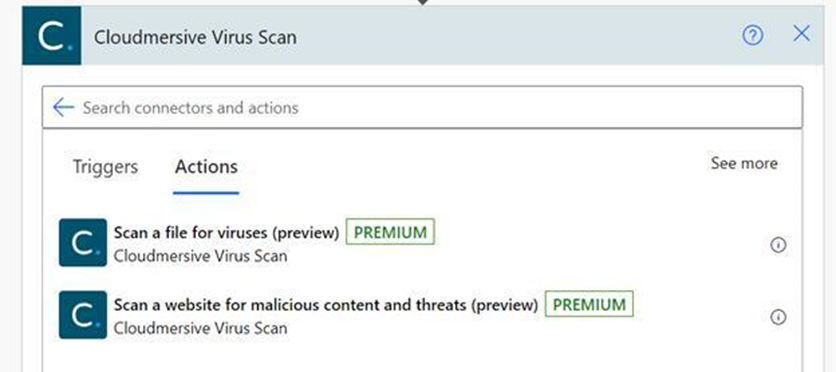
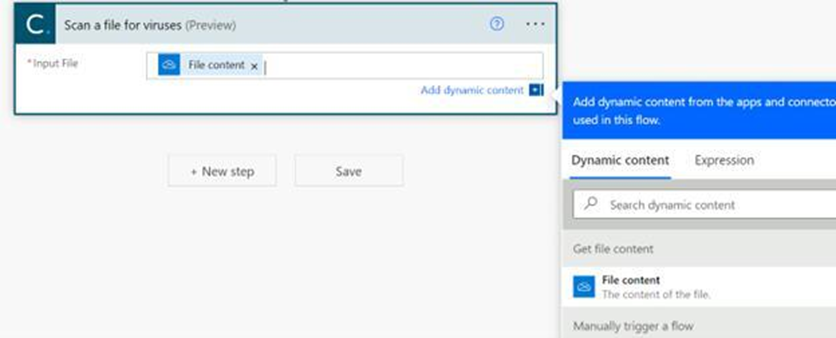
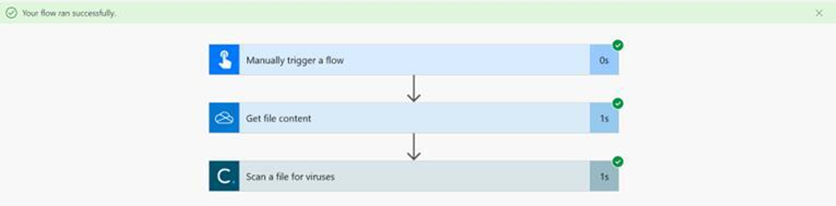
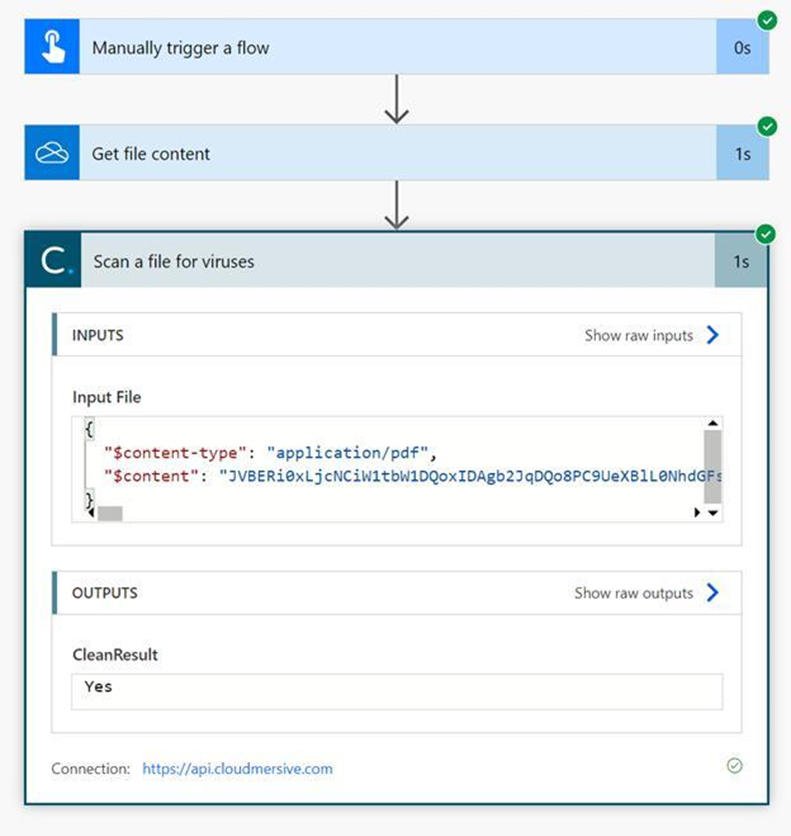
Did you know that you can scan any file upload for viruses and malware in Power Automate using the Cloudmersive Virus Scan Connector? All you need to do is incorporate the Cloudmersive Scan a File action into your flow diagram, and you can instantly check files against a list of more than 17 million virus and malware signatures, with protection against ransomware, spyware, trojans, and more. Like most operations in Power Automate, this action is very easy to incorporate. Below, we’ll walk through how you can find, configure, and test the Cloudmersive Virus Scan Connector’s “Scan a file for viruses” action in a simple, instant cloud flow (this flow logic works the same way in automated flows). From the flow diagram page, let’s start by adding an example file. We can click “New Step” and use a “Get File Content” action to retrieve the file we want. This file for this demonstration is located OneDrive for Business: Once the "Get File Content" action is open, we can supply our file via the file picker. Now that we have our demonstration file within our flow, we can incorporate the Cloudmersive Virus Scan Connector action. To find the right Connector, let’s click “New Step” again and type “Cloudmersive” into the search bar. Once we do that, a list of Cloudmersive Connectors will populate below our search. From this list, we can go ahead and select the Cloudmersive Virus Scan Connector on the bottom row all the way to the right. Doing so will prompt us to provide a Cloudmersive API key for authentication. To get your API key, head to the Account Management center in your Cloudmersive account, click “View and Manage Keys,” and then copy your API key to your clipboard. If you don’t currently have an API key, you can get one for free by registering a free account (with zero commitments). Once our API key is entered, we’ll jump to the Virus Scan Connector actions list. From this list, we can select the “Scan a file for viruses” action at the top. Doing so will open the connector action body, where we’ll find a prompt to include the input file we want to scan. We can configure this mandatory parameter by clicking on the “input file” field and selecting our file’s content from the Dynamic Content Window. At this point, we can save our flow, confirm our connections, and run our test file through the connector action. When we open the “Scan a file for viruses” action response body, we’ll see our CleanResult response in the action’s Outputs. We can now use the CleanResult response to dictate subsequent actions in our flow, such as deleting or quarantining our file if any viruses or malware are found. That’s all there is to it – now you can add a quick, easy layer of security to any flow. For more information on Cloudmersive APIs and Power Automate Connectors, please do not hesitate to reach out to a member of our sales team. |
Sign Up Now or 

 Blog
Blog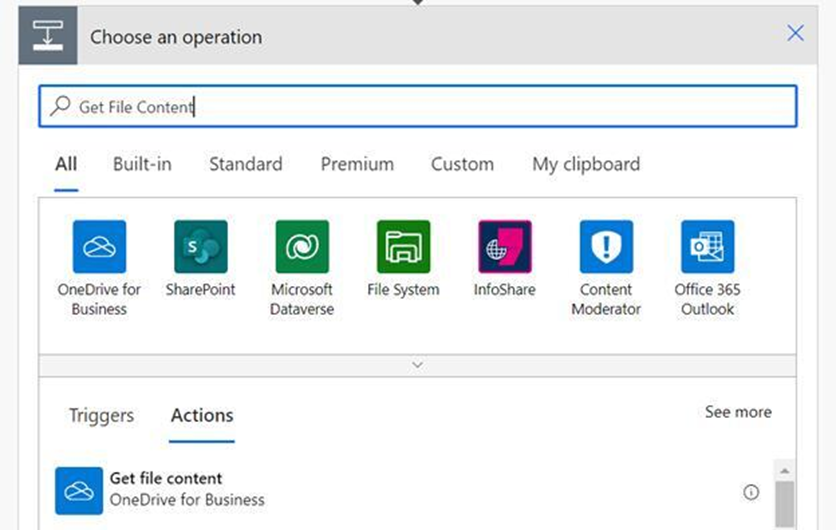
 Virus Scan APIs
 Content Disarm and Reconstruction APIs
 Spam Detection APIs
 Document Conversion & Processing APIs
 Document AI APIs
 Natural Language Processing (NLP) APIs
 Optical Character Recognition (OCR) APIs
 Image and Face Recognition and Processing APIs