
|
| Sending Cloudmersive Reverse Proxy Server Analytics to Third Party Log Management Solutions |
| 11/5/2026 - Brian O'Neill |
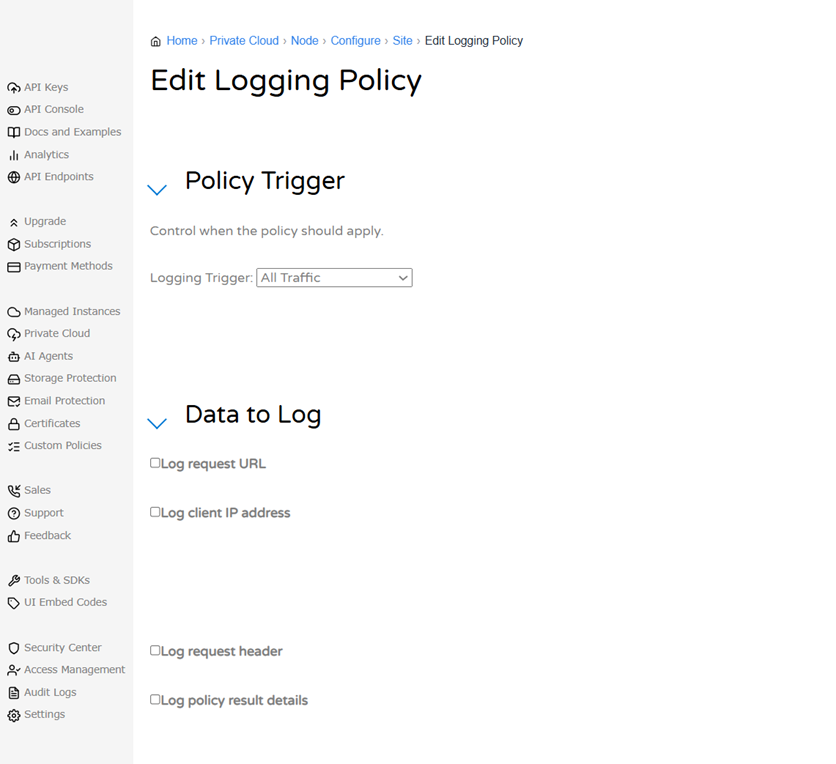
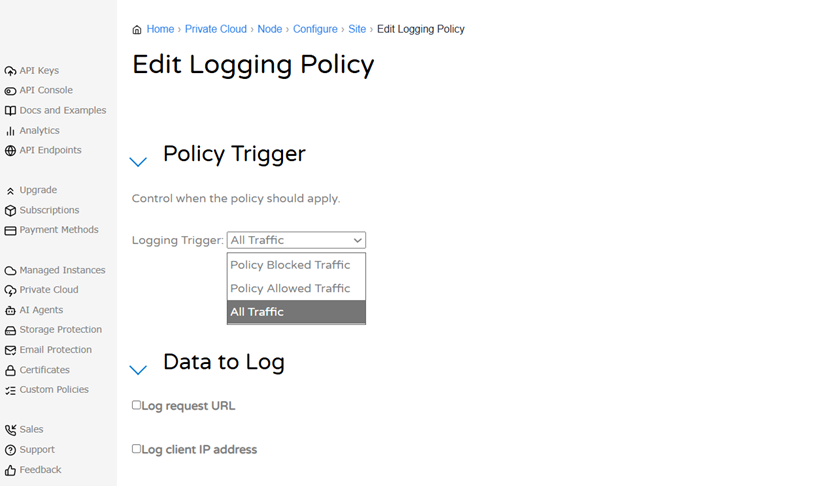
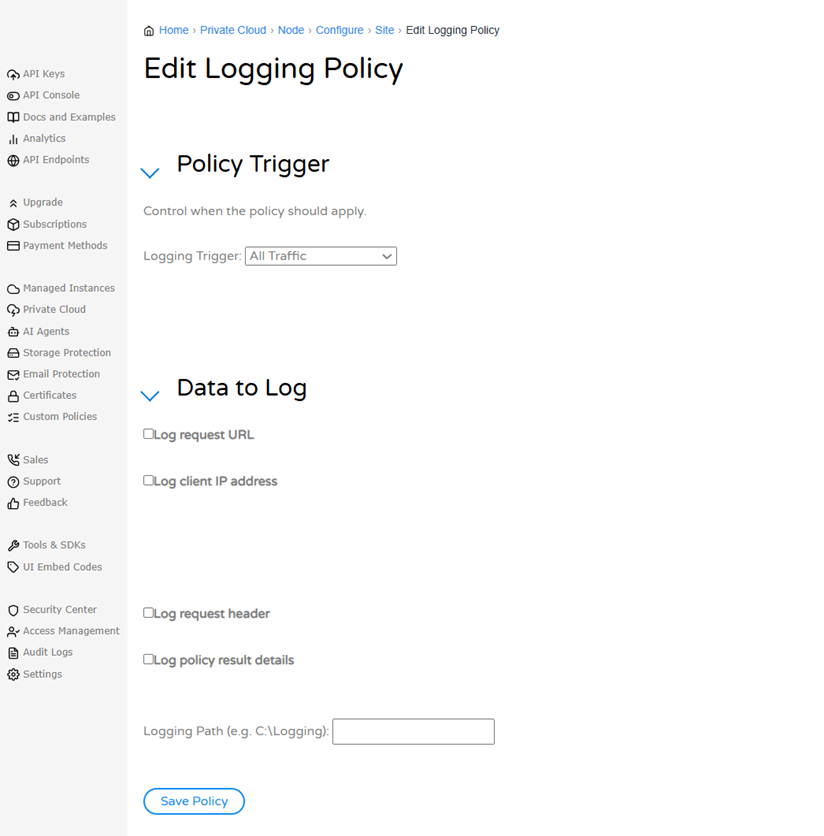
OverviewCloudmersive Reverse Proxy Analytics gives you visibility into the traffic your reverse proxy servers handle. While an export option is available for individual charts and tables created in the Analytics portal, many teams also want that data to be made available in the 3rd party log management tools they already use for security monitoring and compliance. Logging policies make that possible. A logging policy sends traffic and security event data from your Cloudmersive Reverse Proxy Server instance to the logging destination of your choice. This article is for administrators and security and operations teams who are responsible for managing their Reverse Proxy Server instance. In this article, we’ll cover eight third-party destinations: Azure Log Analytics, Splunk, AWS CloudWatch Logs, Azure Event Hub, Azure Event Grid, webhooks (including LogRhythm), Azure Blob Storage, and local disk. For each of these destinations, we’ll show how to set up the logging policy in the Cloudmersive Management Portal and we’ll describe where to find the connection details in the destination platform. How Logging Policies WorkLogging policies are configured per site in the Logging Policies section of the site’s Manage Site page. You can add more than one policy to a site. Each policy operates independently, so you can send logs to several destinations at the same time without issue. Every policy offers the same two groups of settings, shown in Figure 1. The first is Policy Trigger, which controls when the policy logs a request. The Logging Trigger dropdown, shown in Figure 2, offers three choices: Policy Blocked Traffic, Policy Allowed Traffic, and All Traffic, which is the default. The second group is Data to Log, a set of checkboxes: Log request URL, Log client IP address, Log request header, and Log policy result details. All these options are unchecked as their default setting. Many policies add settings of their own, which we describe later on in this article in the destination guides.
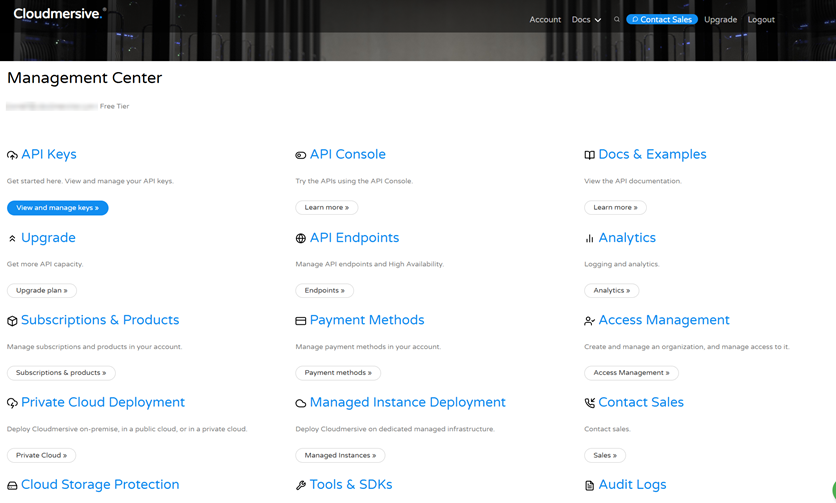
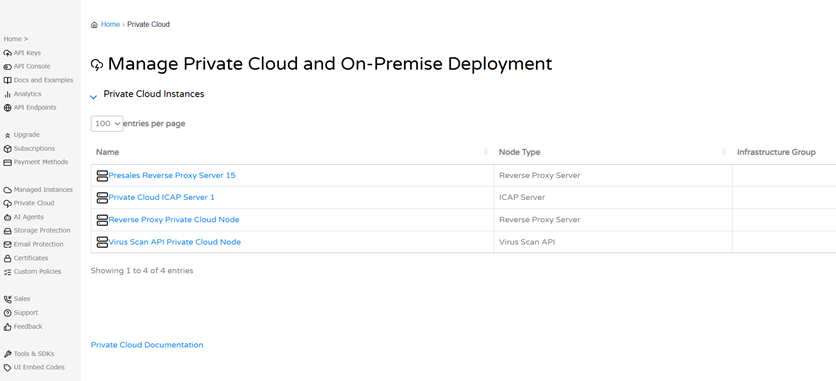
Note that some details are always included, no matter what you check. Every log includes the Node ID, Transaction ID, HTTP response code, content lengths, and response timing metrics. Because request headers and URLs can contain sensitive information, we recommend checking only the boxes you need. Adding a Logging PolicyBefore you begin adding a logging policy, first make sure the reverse proxy node has at least one site. If it doesn’t, open the node’s Sites tab and select Add Site before continuing. Navigating to Logging Policies1. Sign in to the Cloudmersive Management Portal and select Private Cloud Deployment from the management center (Figure 3).
2. Select your reverse proxy node from the list (Figure 4).
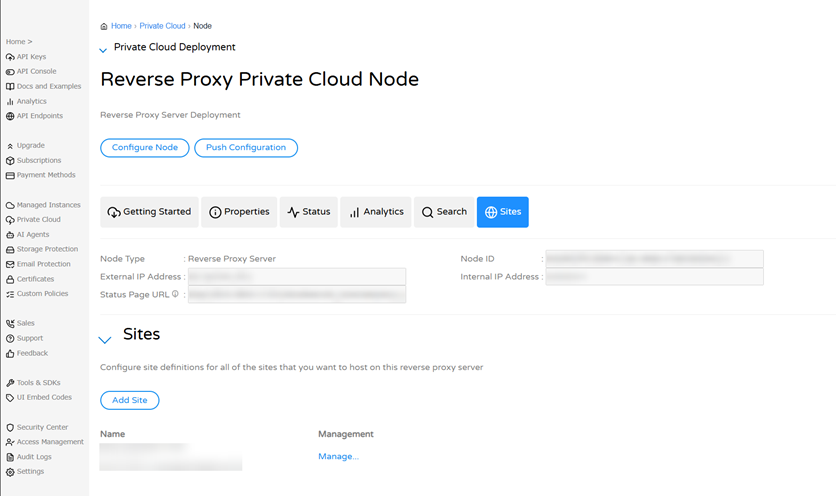
3. Open the node’s Sites tab and select Manage… next to the site you want to add logging to (Figure 5).
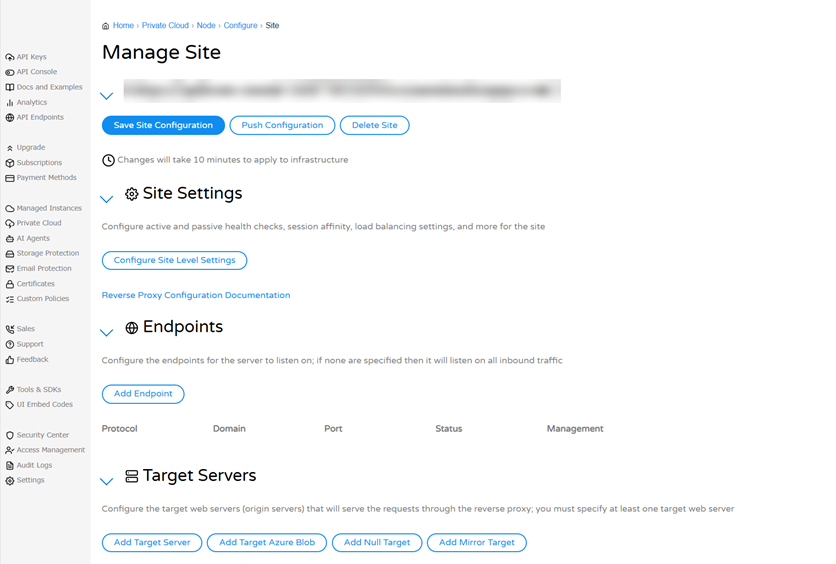
4. On the Manage Site page (Figure 6), you should see Save Site Configuration and Push Configuration buttons, which we’ll use at the end.
5. On the Manage Site page, scroll down to the Logging Policies section and select Add Logging Policy (Figure 7).
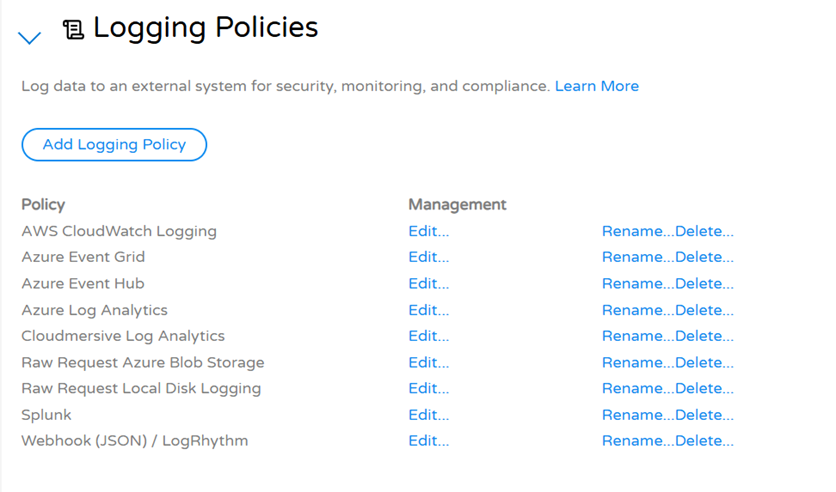
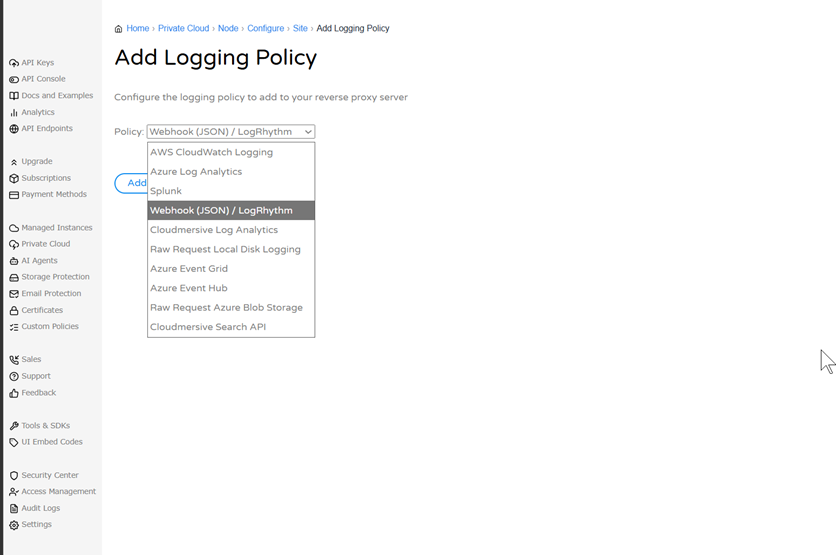
6. Choose your 3rd party destination from the Policy dropdown, then select Add Policy (Figure 8). The list includes the eight destinations covered in this article.
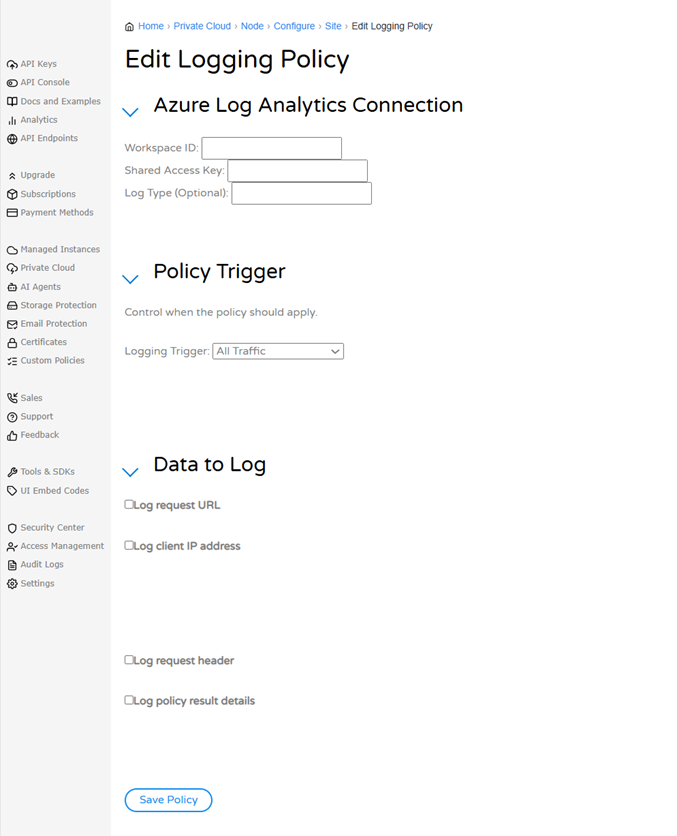
7. The policy now appears in the Logging Policies list. Select Edit… next to it, choose your Logging Trigger and Data to Log settings, enter the destination’s connection details (described in the next sections), and select Save Policy.8. Return to the Manage Site page and select Push Configuration. Note that changes take about 10 minutes to apply to infrastructure, so you should allow some time to pass before expecting logs to flow to your destination.Destination GuidesAzure Log AnalyticsThe Azure Log Analytics policy sends log entries to a Log Analytics workspace in Azure. Cloudmersive asks for three values to share data with this workspace. Workspace ID identifies the workspace, Shared Access Key authenticates to it, and Log Type (optional) is the custom name your logs appear under in the workspace.
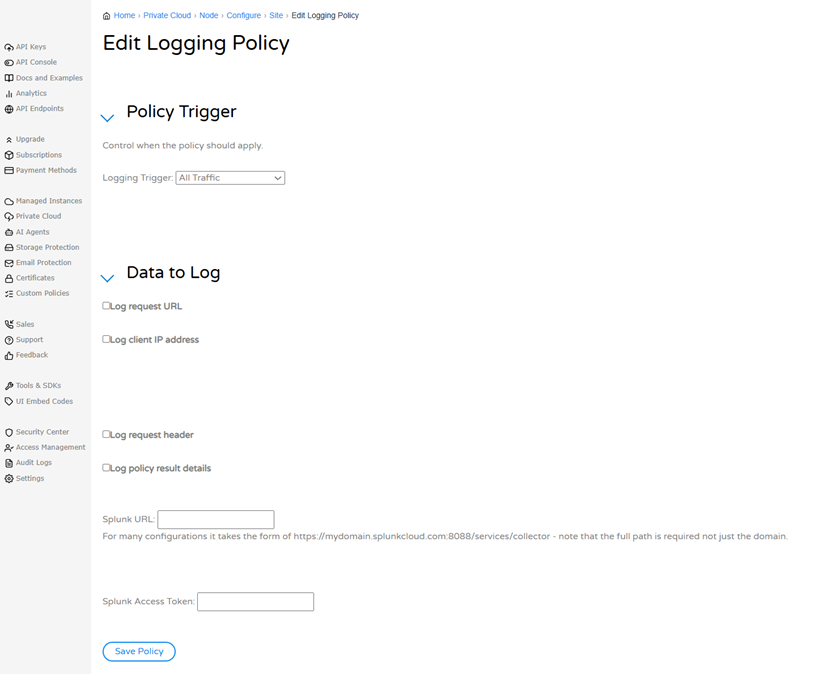
You can acquire all these details from the workspace you want to use. If you’re having difficulty locating your keys, the suggested way to get them is through Azure CLI using the command Once data arrives in your workspace, each entry has an id, a datetime, and a message field that holds the log data as JSON text, so queries need to parse it to read individual fields. SplunkThe Splunk policy sends log entries to Splunk through its HTTP Event Collector (HEC). Cloudmersive asks for two values: the Splunk URL, and a Splunk Access Token.
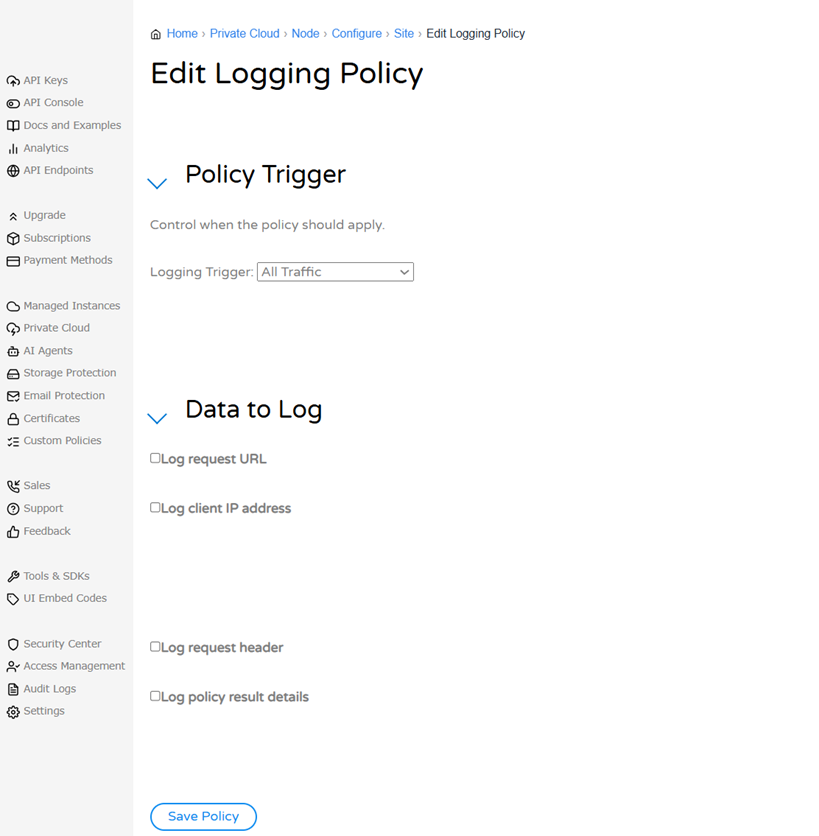
Both values come from Splunk. In Splunk, enable HTTP Event Collector, create a token, and then enable that token. The token is what you will paste into the Splunk Access Token field. The URL depends on your type of Splunk. Self-hosted instances use a URL like AWS CloudWatch LogsThe AWS CloudWatch Loggins policy sends log entries to CloudWatch Logs. Unlike the other destinations, its form has no connection fields; it shows only the Policy Trigger and Data to Log settings.
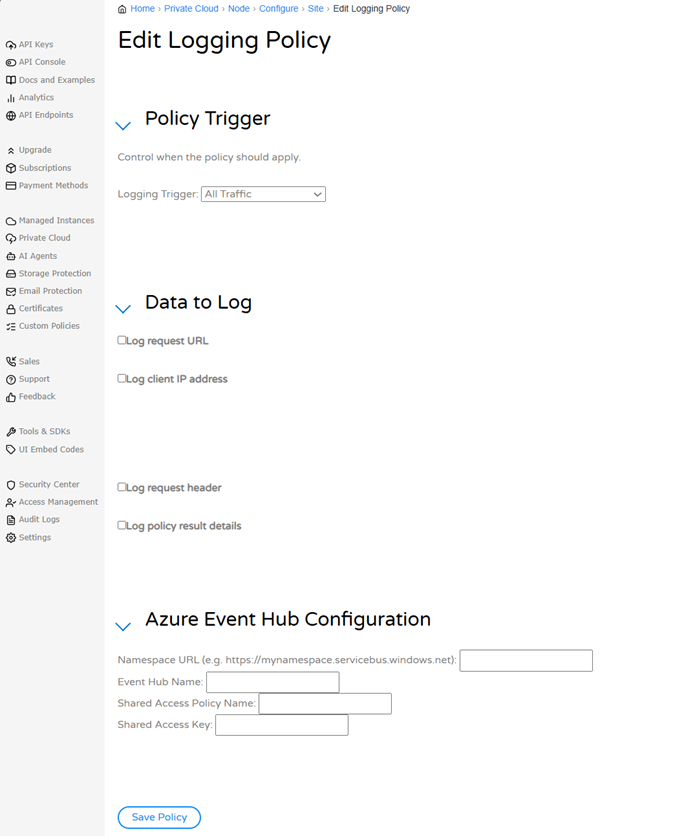
We will update this entry with more information. Azure Event HubThe Azure Event Hub policy sends log entries to an Event Hub for high-volume event streaming and processing. Cloudmersive asks for four values to share data with Event Hub: the Namespace URL, Event Hub Name, Shared Access Policy Name, and Shared Access Key.
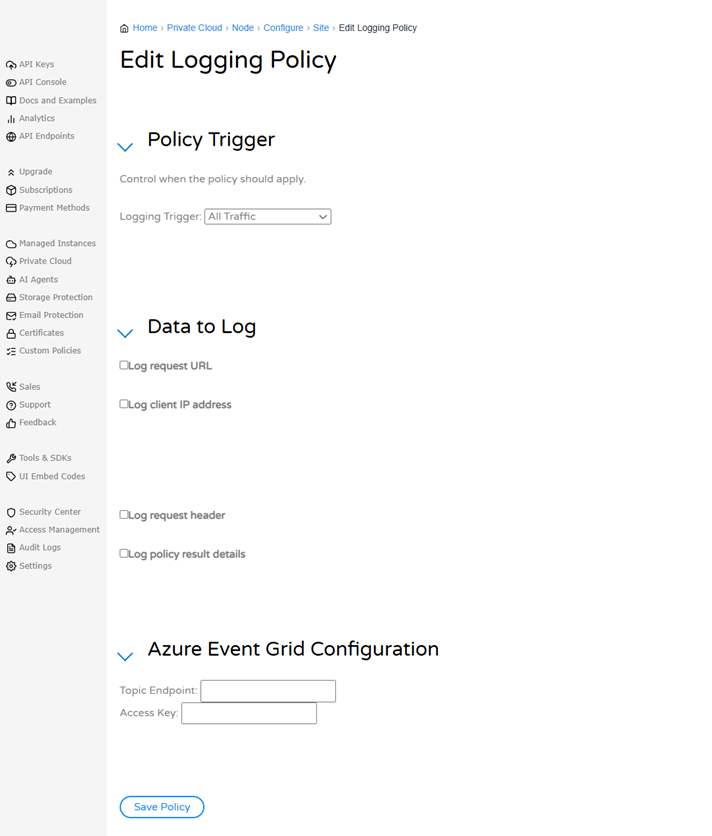
First, create the namespace and Event Hub in Azure. Then, on the namespace page, open Shared access policies under Settings. The default namespace policy is RootManageSharedAccessKey, and you can add your own policy with Send or Listen permissions. Any policy you create needs at least the Send permission. An individual event hub has no default policy, so you would create one there. The policy name and its key go into the matching fields found in the Cloudmersive Edit Logging Policy page for Azure Event Hub. The Namespace URL is your namespace’s address, in the form Azure Event GridThe Azure Event Grid policy sends log entries to an Event Grid topic. Cloudmersive asks for two values to send data to an Event Grid: the Topic Endpoint and the Access Key.
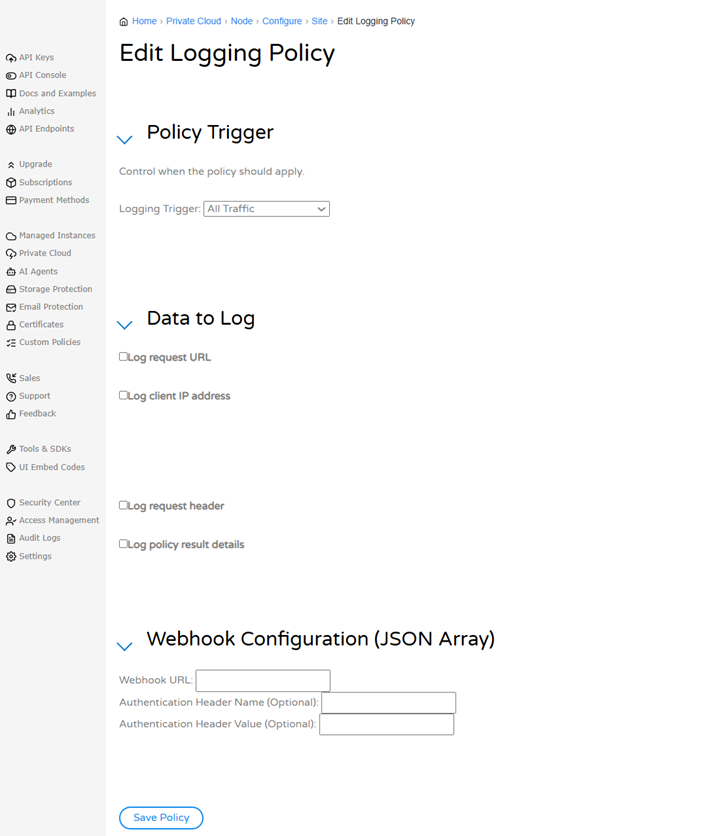
Both values come from the topic in Azure. The endpoint is on the overview tab of the Event Grid Topic page. The access key is on the Access keys tab of the same page. Keep in mind that a topic routes events to its subscribers, so you’ll want a subscription set up to receive them. Webhook(JSON) / LogRhythmThe webhook policy sends entries as JSON to a URL you provide, so it works with any system that can receive HTTP requests, including LogRhythm. Cloudmersive asks for a Webhook URL and, optionally, an authentication header name and value. Authorization and X-Api-Key are examples of header names.
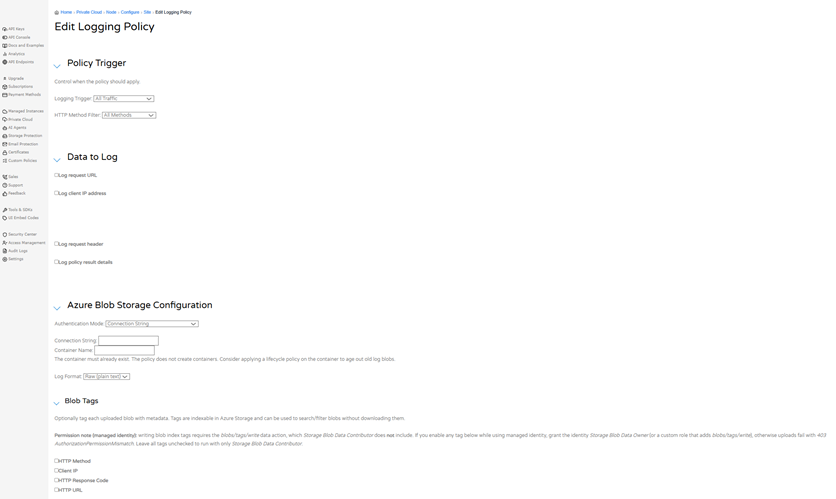
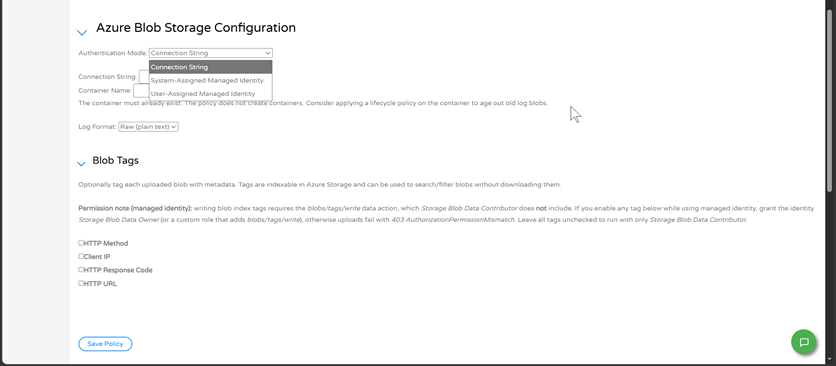
For LogRhythm, the order matters. You must first create the webhook in LogRhythm, then add a Webhook policy in Cloudmersive with that webhook, check all of the logging options, and save. You should allow about 10 minutes for the configuration to propagate. Azure Blob StorageThis policy stores log entries as blobs in an Azure storage container. It appears in the policy list as Raw Request Azure Blob Storage. On top of the common settings, its Policy Trigger section adds an HTTP Method Filter, which defaults to All Methods.
Authentication Mode offers three choices (Figure 17): Connection String, System-Assigned Managed Identity, and User-Assigned Managed Identity. Connection string is the default, and it adds a Connection String field. Container Name is the container that receives the logs; note that the container must already exist, because the policy does not create it.
To find a connection string, open your storage account in the Azure portal, go to Security + networking, then Access keys, and show the keys to copy the connection string. Access keys give full access to the storage account, so it’s recommended to handle them carefully. Your containers are listed under the storage account’s Containers section. You can also tag each blob with its HTTP Method, Client IP, HTTP Response Code, or HTTP URL, which makes blobs searchable in Azure Storage without downloading them. If you use a managed identity and turn on any tag, the form notes that the identity needs the Storage Blob Data Owner role or a custom role that adds blob tag writing. Without tags, Storage Blob Data Contributor is enough, and without permission uploads will fail with a 403 error. Local Disk LoggingThe Local Disk Logging policy, shown in the list as Raw Request Local Disk Logging, writes log entries to files on the reverse proxy server. On top of the common settings, it asks for a Logging Path, such as
Best Practices and NotesCheck only the Data to Log options you need. Request URLs and headers can contain sensitive information, and this data will be stored in a system outside Cloudmersive. Treat access keys, tokens, and connection strings like passwords. Avoid pasting them into documents or screenshots, and rotate them immediately if they are ever exposed. If you send logs to Azure Blob Storage, add a lifecycle rule to the container so old logs are removed on a schedule. If you use Local Disk Logging, plan for how files will be rotated and cleaned up on the proxy server. Cloud platforms change where they keep their settings from time to time. If a menu or page described in this article looks different to what you’re setting, check the platform’s current documentation for the new location. Learn MoreTo learn more about the analytics in the Cloudmersive Management Portal, see our Reverse Proxy Analytics article. For a full list of logging policy parameters, see the Logging Policies Reference in the Cloudmersive knowledge base. To learn more about Cloudmersive Reverse Proxy Server, please contact your sales representative. |
Sign Up Now or 

 Technical Articles
 Virus Scan APIs
 Content Disarm and Reconstruction APIs
 Spam Detection APIs
 Document Conversion & Processing APIs
 Document AI APIs
 Natural Language Processing (NLP) APIs
 Optical Character Recognition (OCR) APIs
 Image and Face Recognition and Processing APIs