
|
| How to Watermark PDF Files in Nintex |
| 6/14/2023 - Brian O'Neill |
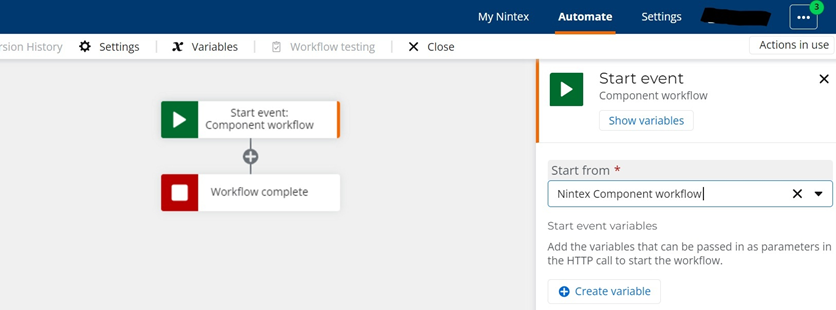
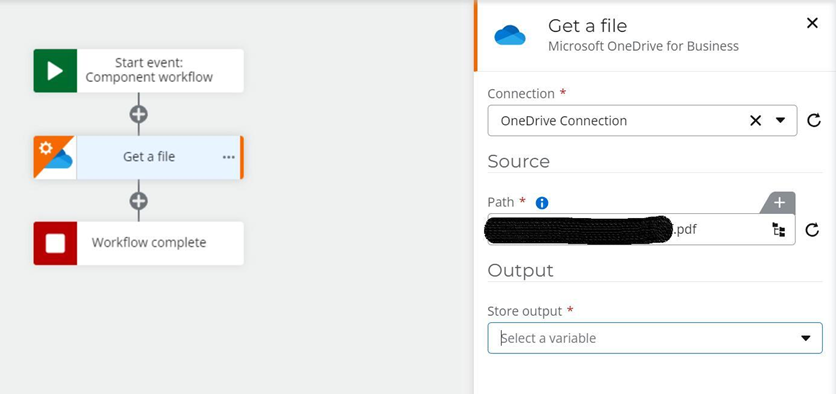
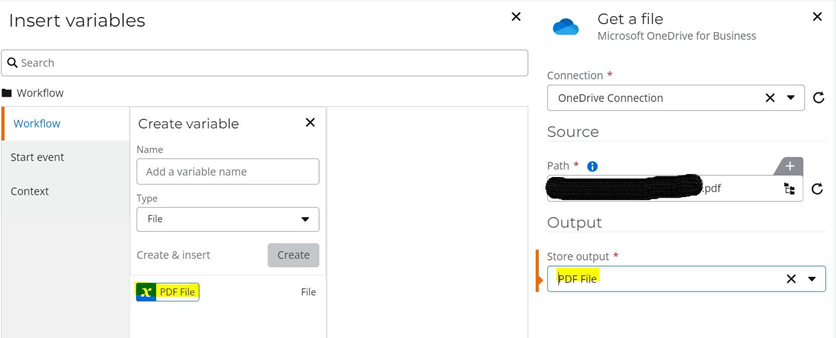
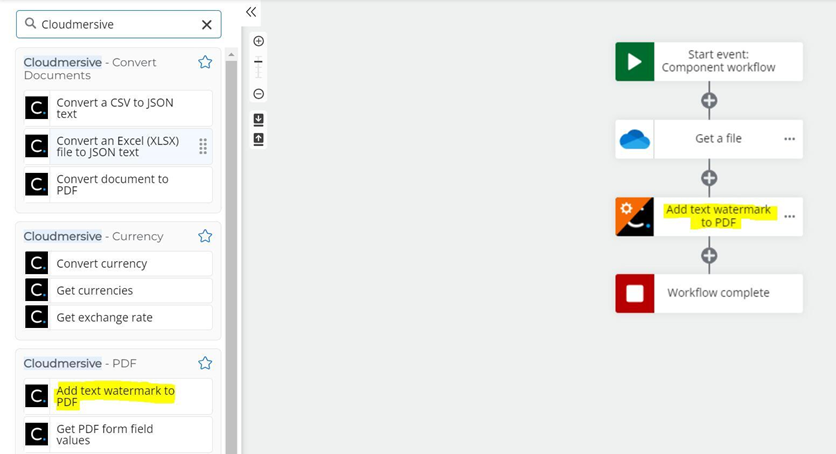
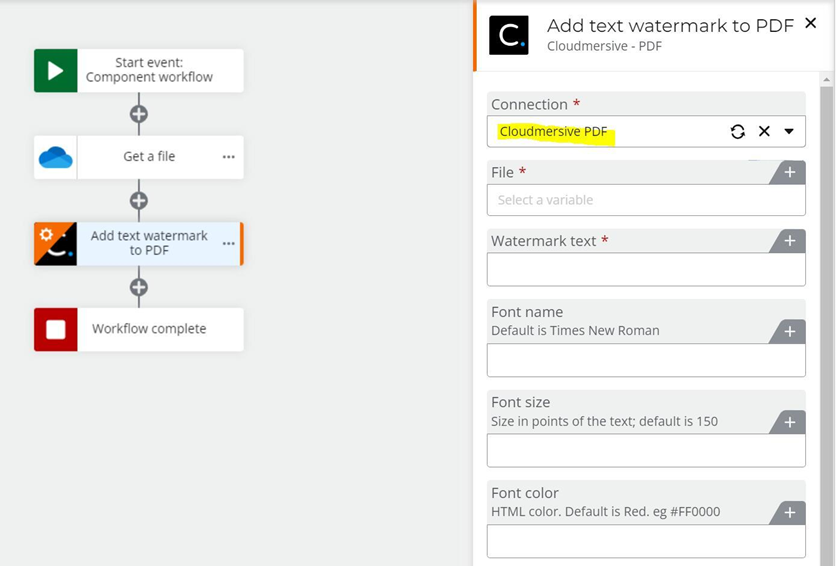
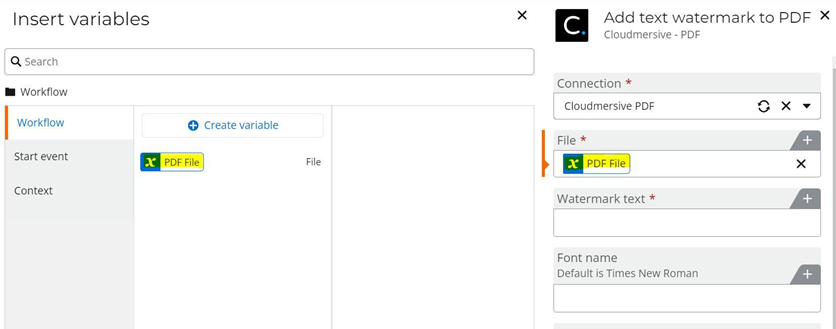
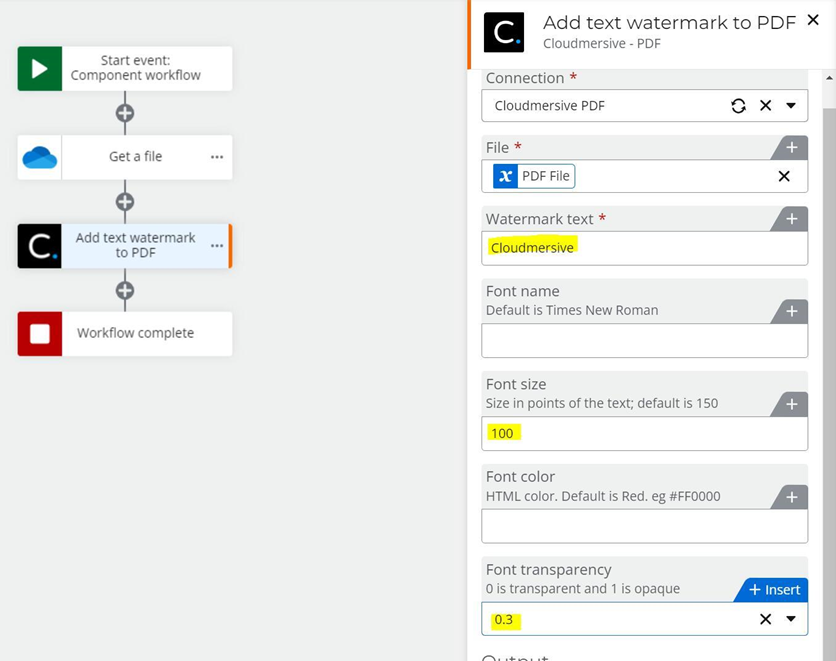
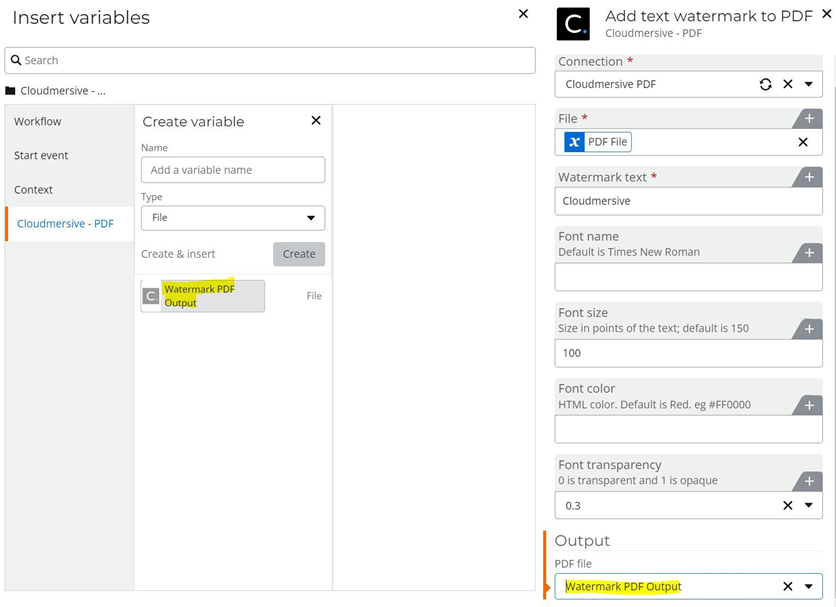
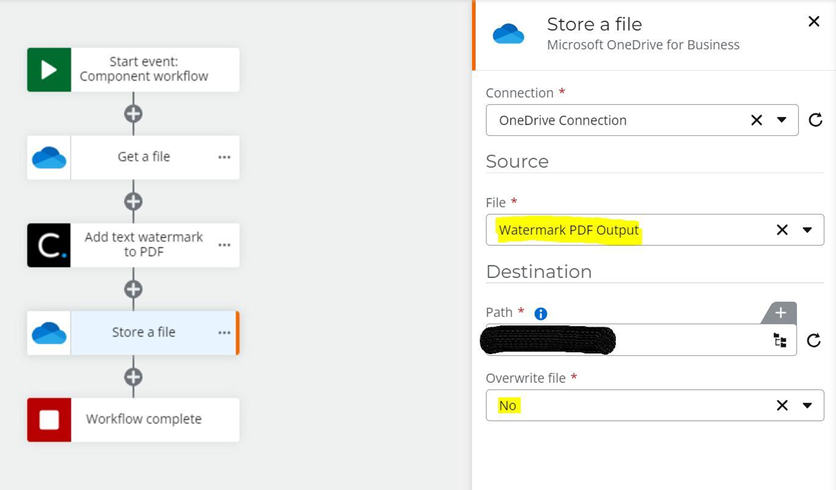
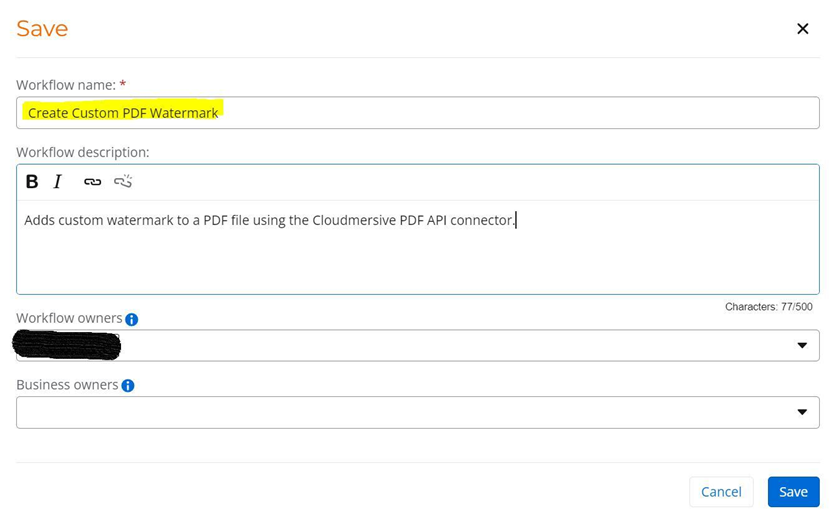
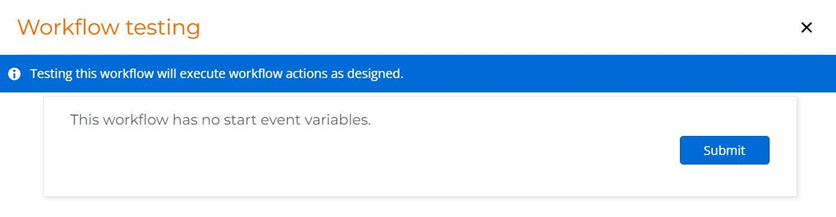
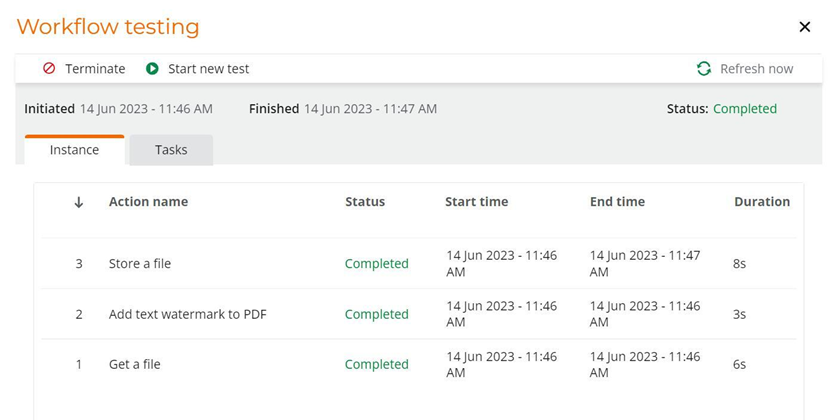
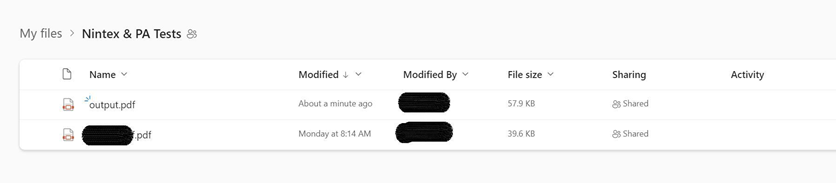
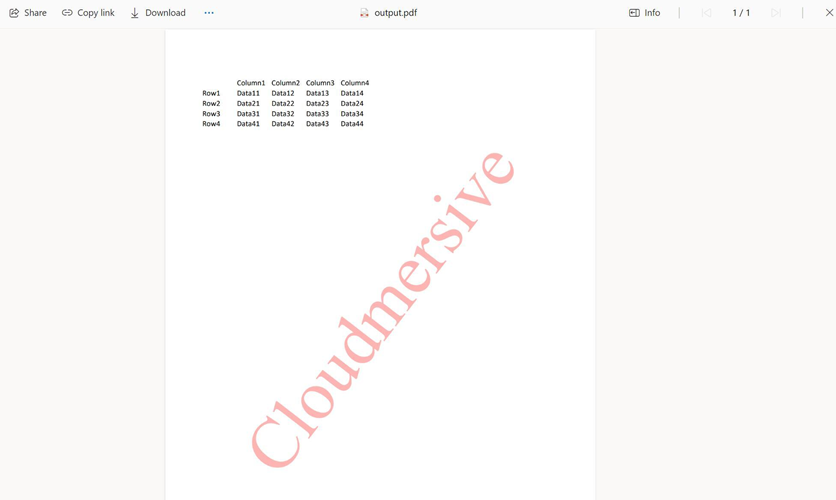
Watermarks are semi-transparent text labels generally used to protect documents from unauthorized use. They can also help promote a brand or enhance the visual appeal of a document depending on the use case. Using the Cloudmersive PDF API in Nintex, you can easily create custom watermarks and apply them to any PDF document in a few quick steps. In this article, we’ll demonstrate how you can design a Nintex component workflow that adds a fully customized watermark to a single PDF file. 1 – Starting from the Nintex workflow design page in our web browser, our first step is to click on the “Start From” dropdown and select the “Component Workflow” option. 2 – Next, let’s add a step to grab our PDF file. This file used in this example workflow lives in OneDrive for Business, so we’ve included the “Get a File” action in our workflow. This action can be found by searching “OneDrive” or “Get a File” in the search bar on the lefthand side of the page and selecting it from the list of options. Using any action in Nintex starts with providing authentication credentials via the “Connection” dropdown on the righthand side of the page, and it ends with creating a variable to store the output data from that action. To create an output variable, click on the “Select a Variable” tab under “Store Output,” click “Add Variable,” and then give the variable a name and confirm its data type. In this case, our data type should be “File”. Once the variable is created, it can be accessed from the “Select a Variable” dropdown. In the below screenshot, we’ve created a variable called “PDF File” and used it to capture the output file from our OneDrive connector. 3 – We can now incorporate out Cloudmersive PDF API action. To find the watermark action, let’s type “Cloudmersive” into the search bar on the lefthand side of the page. This brings up a list of Cloudmersive API connector actions; we can now click on the “Add Text Watermark to PDF” action and drag it into our workflow. From here, we can click on the action to configure it in the tab on the righthand side of the page. To create our Cloudmersive Connection, let’s click on the “Connection” dropdown and select “Add Connection”. After that, we can give our connection a relevant name like “Cloudmersive PDF”, and then we can authenticate our connection by copying the API key from our Cloudmersive account page and pasting it into the “API key” field. If you don’t currently have a Cloudmersive API key, you can get one for free by registering a free account with no commitment (this will allow a limit of 800 API calls per month). With our connection established, let’s now hover over the “File” input parameter and click “insert”. This brings up the option to select the “PDF File” variable we created in the previous step. Let’s click “insert” on that variable to include it in our Cloudmersive PDF API request. We can now begin customizing our watermark. We can set the watermark’s display text in the “Watermark Text” field, and after that, we can specify out desired font type (by name), as well as the font size, font color, and font transparency level. In our example, we’ve set “Cloudmersive” as our watermark display text, kept the font name at the default value (Times New Roman), set the font size to 100, kept the font color at the default value (red), and set the font transparency level to 0.3. To finish configuring this action, we need to store its output in a custom variable. We can do so by following the exact same process outlined in the OneDrive “Get a File” step above. Let’s select “Add Variable” from the “Select a Variable” dropdown, give our variable a relevant name like “Watermark PDF Output”, ensure the data type says “File”, and then click “Create” to store our variable. Once stored, we can access it from the “Select a Variable” dropdown. The configuration step for our “Add Text Watermark to PDF” action is now complete. 4 – Let’s now add a final step to generate our watermarked PDF. This example workflow will once again use a OneDrive for Business connector, so we’ve included the OneDrive “Store a File” action in our workflow. This action is configured to accept the Watermark PDF Output” variable we created and store it in a OneDrive folder of our choosing. We’ve elected to not overwrite existing files in future workflow runs. 5 – Now we can save and test our workflow. Let’s click “Save” in the upper left corner of the page, and let’s then give our workflow a relevant name like “Create Custom Watermark.” In the workflow description, we can specify that this workflow uses the Cloudmersive PDF API connector to accomplish its task. We can optionally elect to set our workflow and business owners, and once we’re done, we can click “Save” to finish the saving process. 6 – After saving our workflow, we can test our workflow by clicking on the “Workflow Testing” option at the top of the workflow design page. Once we do so, Nintex will stage our workflow before asking us to click “Submit” to confirm testing without dedicated start event variables. Once we click “Submit”, Nintex will run the test and update us with instance details every 10 seconds. We’ll know the test succeeded once we see “Completed” in the “Status” column for each action in our workflow. 7 – With our test complete, we can now check our target folder for the results of our operation. We didn’t include a step to name our new file, so we should see a new PDF file with the generic name “output.pdf” in our folder. When we open this file, we should see our new watermark running across the center of our document following our exact formatting specifications. At this point, we’re all done. It’s just that easy to create custom watermarks in Nintex using the Cloudmersive PDF API connector. For more information about Cloudmersive API connectors in Nintex, please feel free to reach out to a member of our sales team. |
Sign Up Now or 

 Technical Articles
 Virus Scan APIs
 Content Disarm and Reconstruction APIs
 Spam Detection APIs
 Document Conversion & Processing APIs
 Document AI APIs
 Natural Language Processing (NLP) APIs
 Optical Character Recognition (OCR) APIs
 Image and Face Recognition and Processing APIs