
|
| How to Scan SharePoint List Item Attachments using the Cloudmersive Virus Scanning Connector in Power Automate |
| 4/13/2023 - Brian O'Neill |
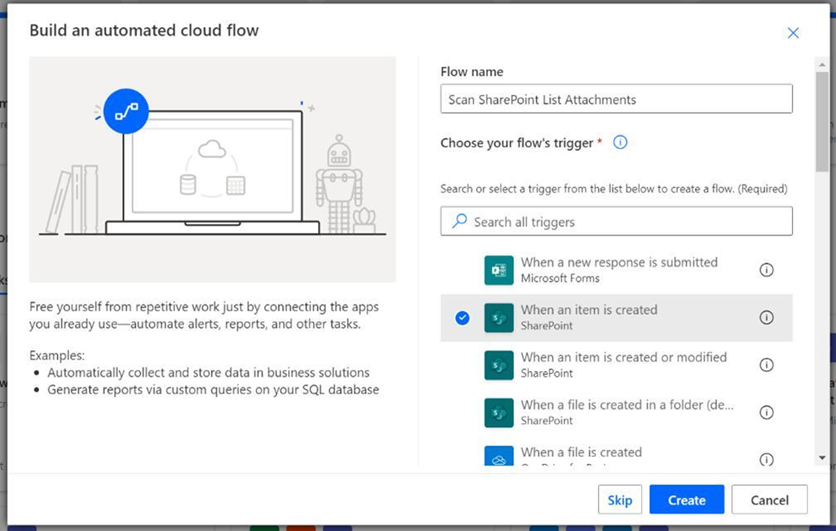
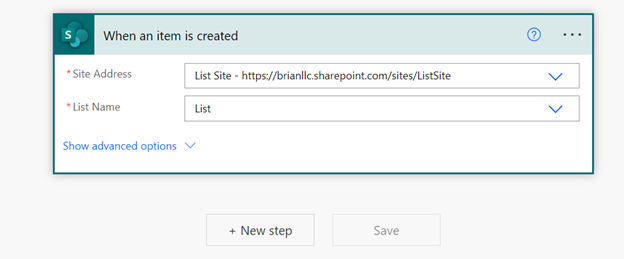
Seemingly harmless, run-of-the-mill document uploads in SharePoint can hide dangerous viruses and malware threats under the guise of valid file extensions. The longer these infected files remain undetected, the more likely it is that a member of our organization unwittingly opens one and releases its malicious content into our system. Thankfully, through Power Automate, we can create RPA file security flows which automatically run when new files are uploaded to specific SharePoint locations. Below, I’ll demonstrate how we can use the Cloudmersive Virus Scanning Connector to ensure new SharePoint List Item Attachments are clean the moment they’re uploaded to a specific list. DemonstrationThe goal of this demonstration is to show how the Cloudmersive Virus Scanning Connector can be used in a Power Automate flow to automatically scan SharePoint list item attachments the moment they’re uploaded. 1 - To accomplish this, we’re going to start on the Power Automate home page and select the Create option on the lefthand side of the page. Doing so will provide us with the following flow options: For this flow, we’re going to select the Automated Cloud Flow option on the far lefthand side. 2 - Once we select this option, we’ll jump into the Build an Automated Cloud Flow tab which allows us to give our flow a name and choose the way our flow will be triggered. At this stage, we can give our flow a relevant name of our choosing, and then we can select the When an Item is Created SharePoint trigger (which should appear high on the list of initial trigger options). At this point, we can click Create at the bottom of the window. Doing so will bring us to the Flow Diagram Page where we can begin assembling our flow logic. 3 - On the Flow Diagram Page, we’ll find our When an Item is Created trigger already opened. We can begin the flow design process by configuring our SharePoint Site Address within the request body and selecting the List Name we want to attach this flow to (for this demonstration, I’ve created a Site Address called “List Site” with a List called “List”). Once we’ve configured these details, we can click New Step. 4 - In the second step of our flow, we’re going to implement a second SharePoint action which will automatically retrieve the attachments from our new SharePoint list items. To find this action, we can type “Get attachments” into the Choose an Operation search bar and select that option when it comes up below. Once we select this option, we’ll have a few important fields to configure. 5 - Just like we did in our trigger step, we’ll need to configure our SharePoint Site Address and List Name once again. After we do that, we’ll need to supply the Id of the List Item which we’re pulling the attachments from. We can accomplish this easily by simply clicking on the Id field and selecting the “Id” option from the Dynamic Content window. Since we chose to use an automated flow, the List Item Id will always represent the most recently uploaded file to our SharePoint list. This step is finished, so we can go ahead and click New Step once again. 6 - Now that our new list items’ attachment IDs are available as Dynamic Content within our flow, we can set up a subsequent step which retrieves the actual contents (file encodings) of those attachments. To do so, we’ll use the SharePoint Get Attachment Content action. To find this action, we can type “get attachment content” into the Choose an Operation search bar and select the correct option when it comes up below. 7 - Once we select this action, we’ll need to again choose our Site Address and List Name from their respective dropdowns. After that, we can again select the ID of our List Item using Dynamic Content from our trigger step. Once we’ve configured the first three fields of our Get Attachment Content action, we can turn our attention to the final field which asks for the File Identifier. We can retrieve this ID by clicking on the File Identifier field and selecting Dynamic Content labeled “Id” from the Get Attachment step. The moment we select this option, Power Automate will automatically create a Control around our SharePoint action called Apply to Each. This action will ensure our attachment content retrieval operation is executed for each item in an array of uploads. 8 - With our file attachment content now available in our flow, we can introduce the Cloudmersive Virus Scanning Connector and task it with scanning each new attachment’s contents. Within the Apply to Each operation, let’s select the option to Add an Action, which will once again open the Choose an Operation search bar. From here, we can type “Cloudmersive” and allow the full list of Cloudmersive Connectors to populate below. From that list, we can select the Cloudmersive Virus Scanning Connector (written as Cloudmersive Virus Scan) with the dark, blue-green logo. Upon selecting this Connector, we’ll be prompted to name our connection and provide an API key for authorization. We can retrieve our API key by visiting our Cloudmersive Account Page, clicking on View and Manage API Keys, and finally clicking Copy next to our API key to add it to our clipboard. Once we’ve successfully established our Cloudmersive connection, we can now view both Cloudmersive Virus Scanning Connector actions on the actions list. From this list, we can click on the Scan a File for Viruses option. 9 - Within the Scan a File for Viruses action, we only have one request field to satisfy, and this simply asks us for our Input File. To satisfy this request field, let’s click on the Input File bar and select the Attachment Content option – which is available from our Get Attachment Content action – from the Dynamic Content window. 10 - At this point, we can save our flow and test it. Power Automate will prompt us to test our flow manually by creating a new SharePoint list item and adding a file attachment to it. Once we do so, we should shortly see green checkmarks appear on each operation in our flow to indicate that they ran smoothly. If we take a closer look at the Scan a File for Viruses output body, we can see that this action provides a simple Boolean response called CleanResult. This response makes it easy to take subsequent steps in our flow depending on the results of the virus scan. For example, if our new file receives a CleanResult: True response, we can prompt our flow to automatically save the attachment in a specific folder of our choosing. If our file receives a CleanResult: False response, we can take steps to automatically delete or quarantine the infected file through various means, and we can set up alert mechanisms (such as through Outlook, Slack, Teams, etc.) to notify relevant stakeholders within our organization about the flow’s concerning results. 11 - To automatically delete SharePoint List Items whose attachments received a CleanResult: False response, let’s click Add an Action once again within our Apply to Each control and type “Condition” into the Choose an Operation search bar. Let’s then select the Condition action once it comes up below. Once we’ve opened the Condition control body, we can use the Choose a Value request field to trigger subsequent flow actions based on previous flow results. In this case, we want to use Dynamic Content from the Scan a File for Viruses action. To do so, let’s first click on the first (lefthand) Choose a Value field and select CleanResult, and then let’s type “false” into the second (righthand) Choose a Value field. Our Condition is now configured such that the If Yes response will trigger based on a CleanResult: False result, and the If No response will trigger if any other value is provided (in this case, that means CleanResult: True). Within the If Yes body, let’s click Add an Action and type “delete item” into the Choose an Operation search bar. Let’s then select the SharePoint Delete Item action when it comes up below. Within this action body, we can quickly provide our Site Address and List Name once again. After that, we can select ID from the Dynamic Content window to specify that the original flow item should be deleted upon receiving a CleanResult: False response. In this example, we’ll leave the If No body blank so that our flow takes no action when it receives a CleanResult: True response. Our flow should look like this when we’ve finished testing: Final ThoughtsIf you have any additional questions about using Cloudmersive Virus Scanning Connectors to scan your SharePoint file uploads, please do not hesitate to contact a member of our sales team (you may also contact a member of our support team through your account page). |
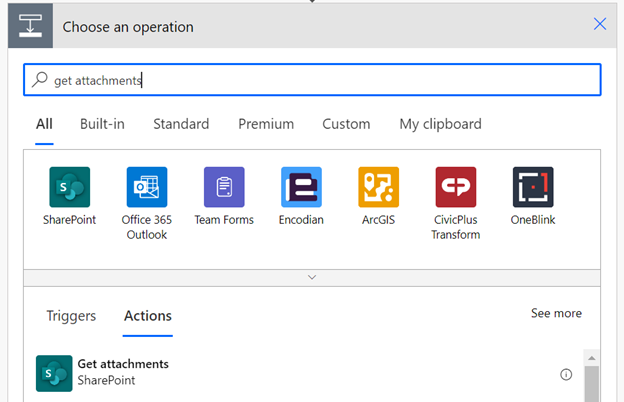
Sign Up Now or 

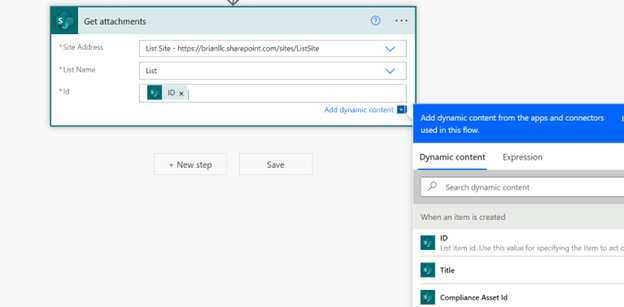
 Technical Articles
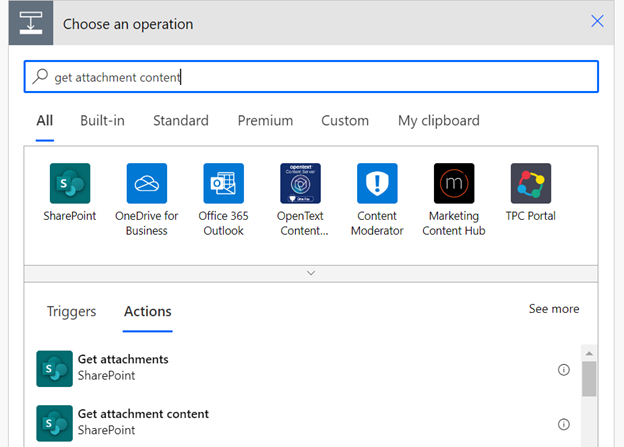
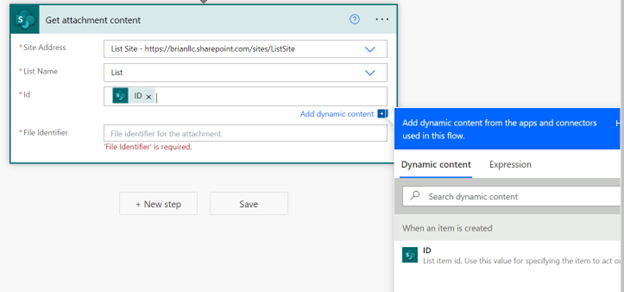
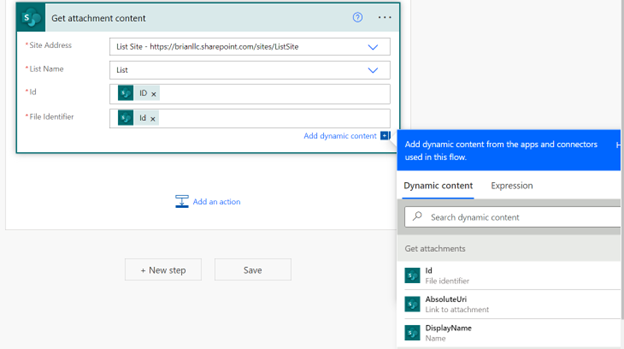
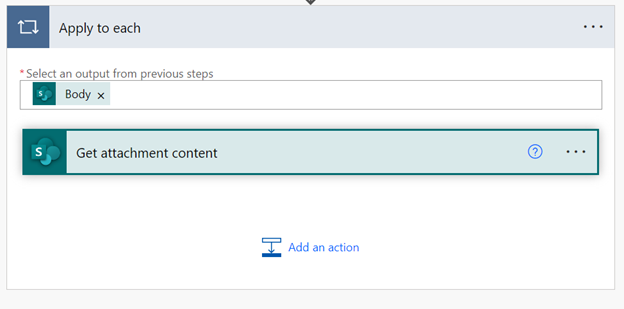


 Virus Scan APIs
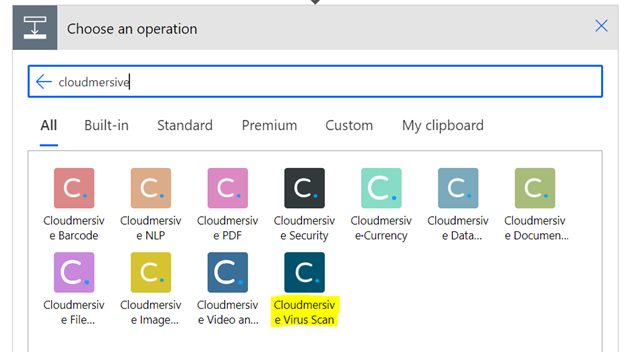
 Content Disarm and Reconstruction APIs
 Spam Detection APIs
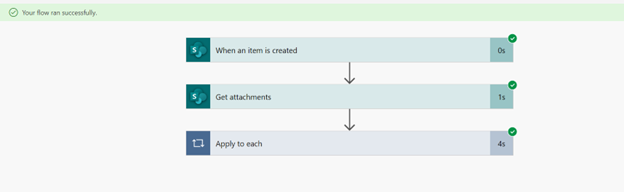
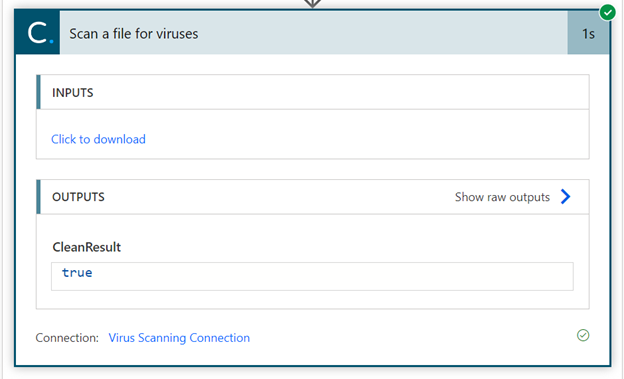
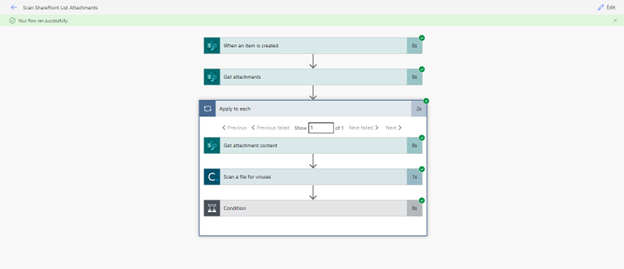
 Document Conversion & Processing APIs
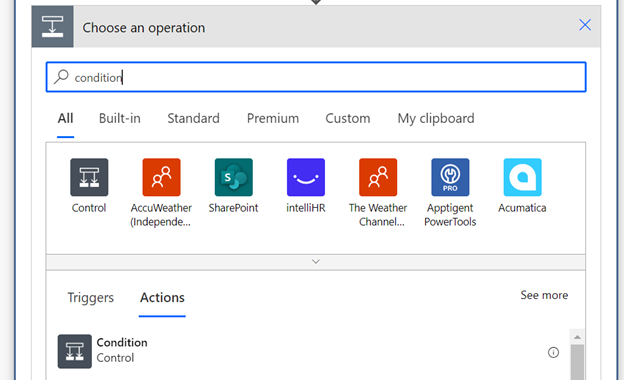
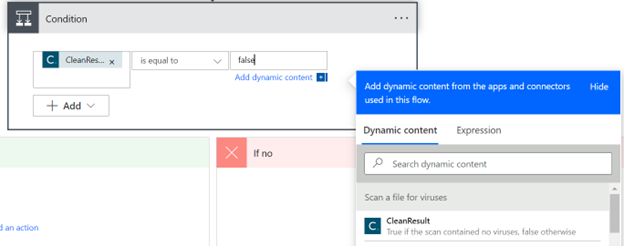
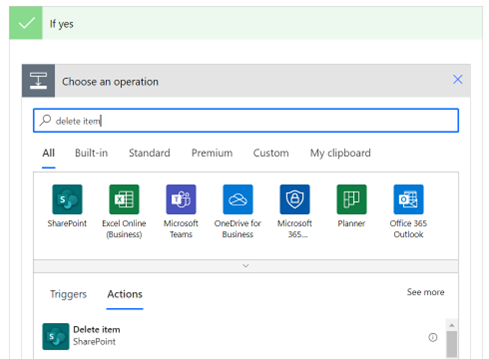
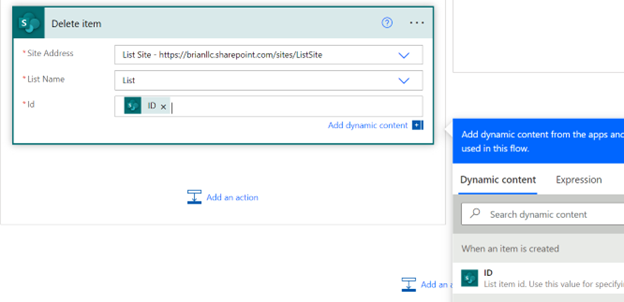
 Document AI APIs
 Natural Language Processing (NLP) APIs
 Optical Character Recognition (OCR) APIs
 Image and Face Recognition and Processing APIs