
|
| How to Scan Outlook Email Attachments for Viruses and Malware using Power Automate |
| 8/30/2023 - Brian O'Neill |
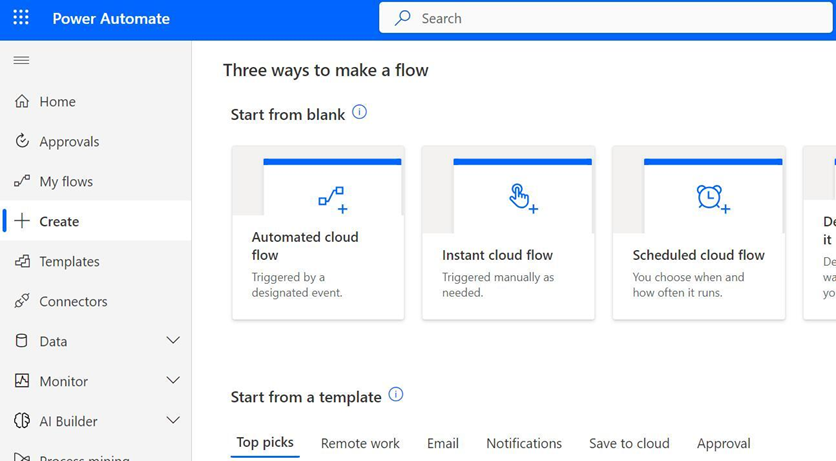
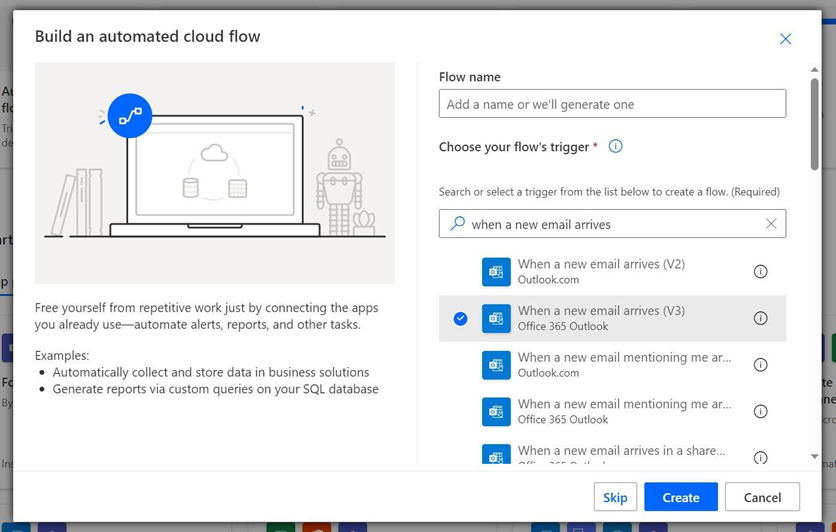
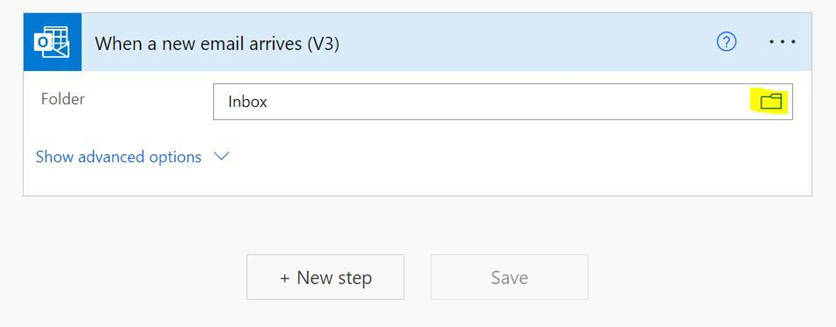
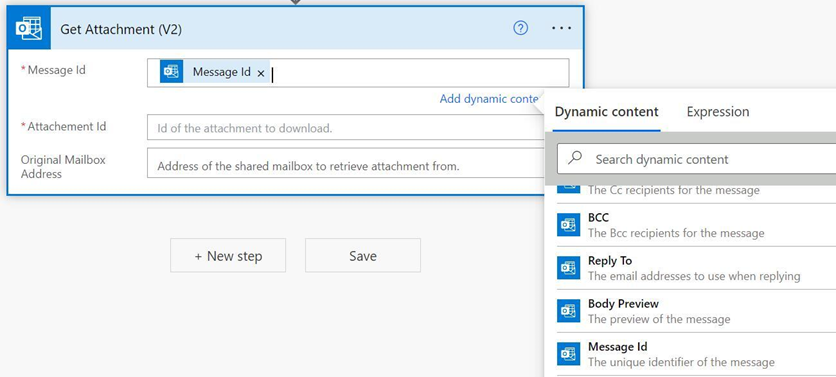
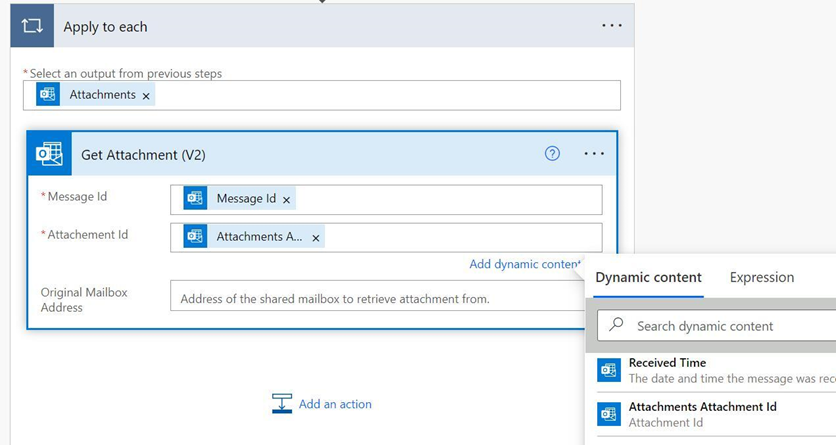
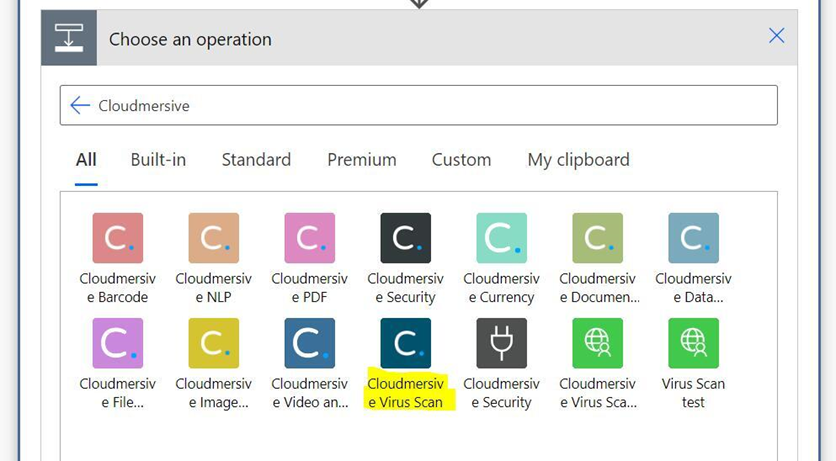
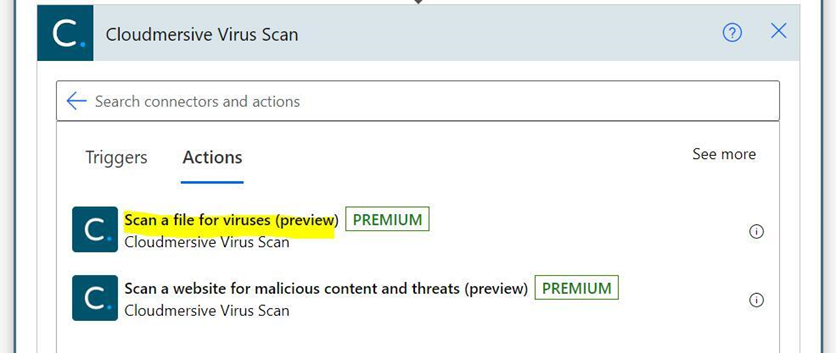
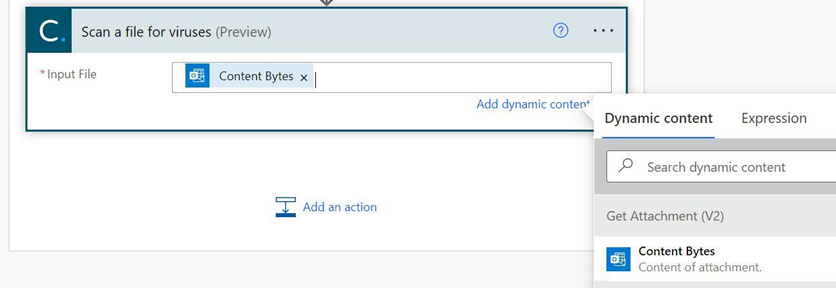
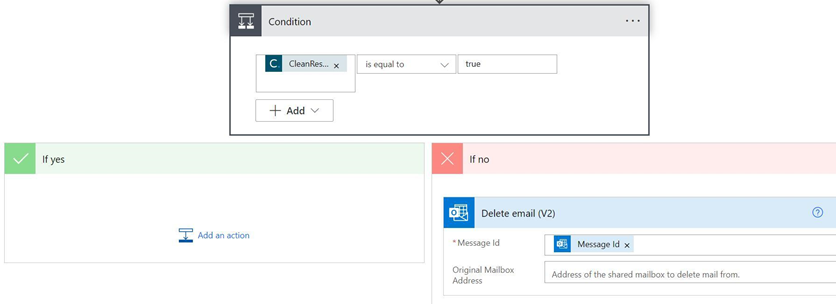
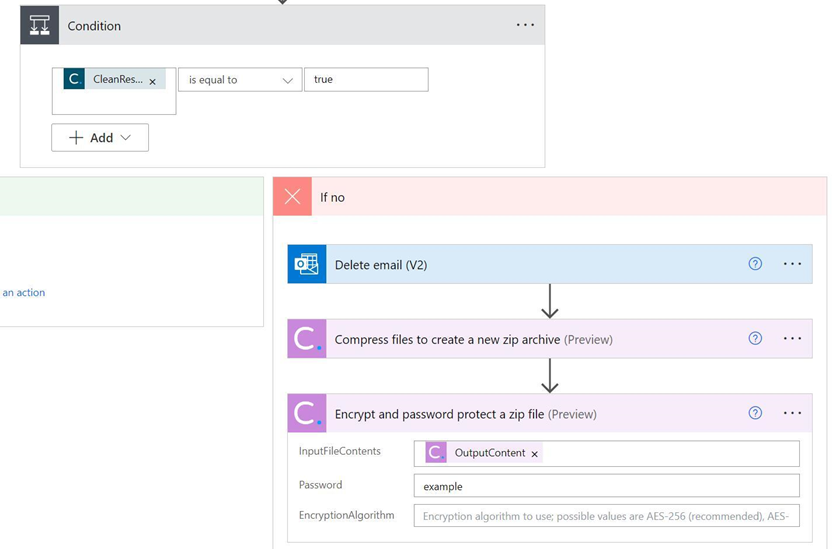
Given the ever-growing popularity of malicious spam emails, it’s worthwhile to layer in security policies against threatening file attachments in our Outlook inbox. Redundancy goes a long way toward protecting our system from unexpected threats. Using the Cloudmersive Virus Scan Connector in Power Automate, we can set up a quick & easy automated flow that checks Outlook email attachments in a specific folder for viruses & malware. This means we can scour files for more than 17 million virus and malware signatures – all in a single automated API request. Below, we’ll walk through all the steps you’ll need to set up your own automated virus & malware scanning flow in minutes. 1 – Starting from the Power Automate home page, let’s click Create on the lefthand side of the page and select the Automated Cloud Flow option. In the Build an Automated Cloud Flow window, let’s search for the When a New Email Arrives trigger associated with the Outlook 365 Connector and select that option. We can now click Create and head to the flow diagram page. 2 – In our flow diagram, the first thing we should do is specify the folder within Outlook we want to scan. Our main inbox should already be selected; to change this, we can follow the folder icon on the righthand side and navigate our Outlook folder path. Once we’ve selected the Outlook folder we want, let’s click New Step and search for an Outlook Connector action called Get Attachment. When we open this action, let’s click on the Message ID field and select corresponding content from the dynamic content window. This content is made available from our trigger step. Let’s then click on the Attachment Id field and select dynamic content called Attachments Attachment Id. Once we click on this option, Power Automate will automatically wrap our Get Attachment action in an Apply to Each control. That’s because emails can contain multiple attachments, so this action might occur more than once when a single email is received. We can leave the Original Mailbox Address field blank for now. 3 – Let’s now incorporate our Cloudmersive Virus Scan Connector action. Staying within the Apply to Each control, let’s click Add an Action and search for Cloudmersive connectors. From the list of Cloudmersive connectors below, let’s select the Cloudmersive Virus Scan Connector with the dark blue-green logo. If we’ve used this connector before, we’ll jump straight to the connector actions list. If we haven’t, we’ll be asked to name our connection and supply our Cloudmersive API key first. We can name our connection anything we want, and we can simply copy the API key from our Cloudmersive account page and paste it into the API key field. Once we reach the actions list, let’s select the Scan a File for Viruses action. Within the Input File field, let’s select the dynamic content labeled Content Bytes made available from our Get Attachment step. Our flow is now ready to trigger upon receiving an email in a specified Outlook folder, retrieve the attachments from that email, and scan the contents of those attachments for more than 17 million virus and malware signatures. If attachments are infected, our Scan a File for Viruses action will return a CleanResult: False response. If attachments are clean, we’ll receive a CleanResult: True response instead. In the former scenario, we’ll also receive a FoundViruses array containing information about the viruses which were identified. 4 – We can efficiently use this action’s Boolean response to trigger a condition that takes certain steps depending on the results of our scan. For example, we can set CleanResult equal to true and ask our If No scenario to delete the original email when false responses are received (while asking our If Yes scenario to do nothing in response to clean files). We could also elect to quarantine the infected files for further analysis while deleting the email to remain safe from immediate harm. We can utilize two Cloudmersive File Processing Connector actions to accomplish this – the first labeled Compress Files to Create a New Zip Archive, and the second labeled Encrypt and Password Protect a Zip File. We can easily test our flow using clean files to receive a CleanResult: True response. Depending on the recommendations/preferences of our Security team, we could trigger a CleanResult: False response using inert malware signatures made available on the EICAR website. For more information on the Cloudmersive Virus Scan API & Virus Scan Connector, please do not hesitate to reach out to a member of our sales team. |
Sign Up Now or 

 Technical Articles

 Virus Scan APIs
 Content Disarm and Reconstruction APIs
 Spam Detection APIs
 Document Conversion & Processing APIs
 Document AI APIs
 Natural Language Processing (NLP) APIs
 Optical Character Recognition (OCR) APIs
 Image and Face Recognition and Processing APIs