
|
| How to Scan Files for Viruses, Malware, and Non-Malware Threats in Nintex |
| 6/8/2023 - Brian O'Neill |
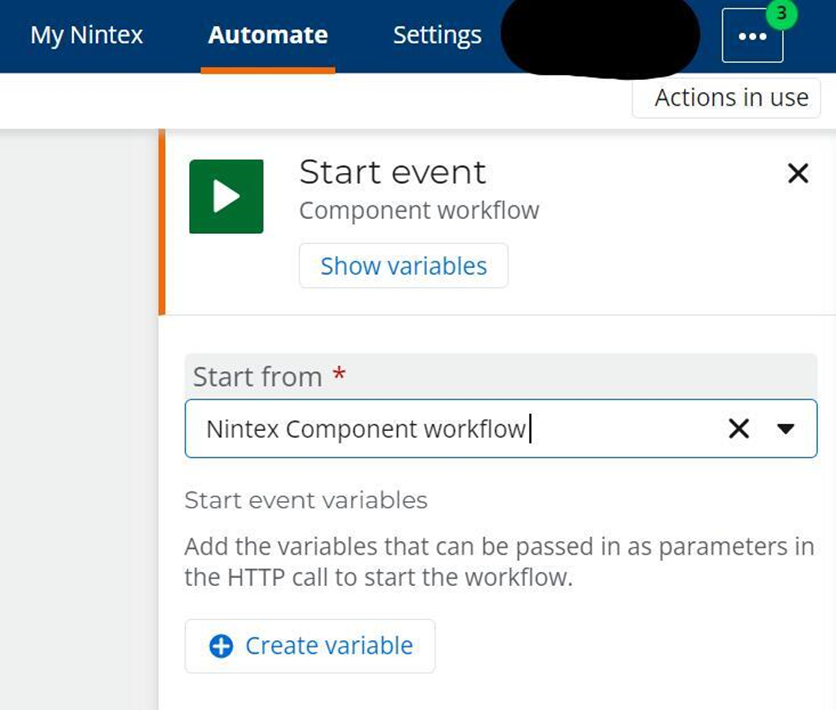
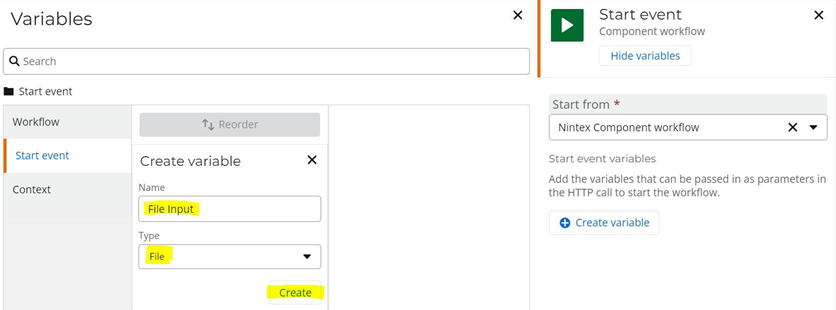
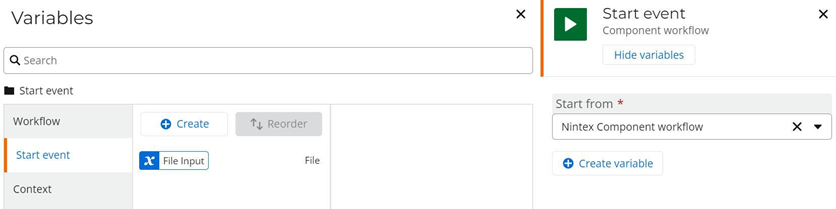
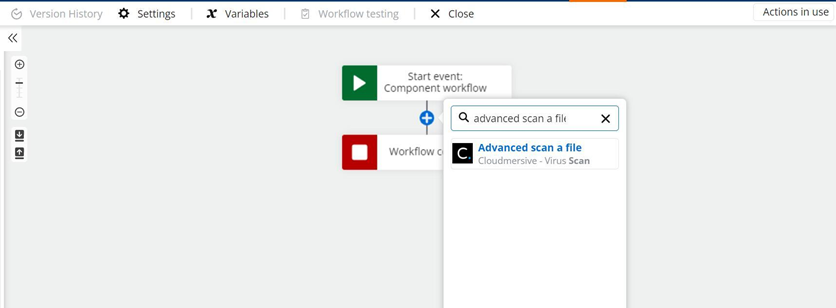
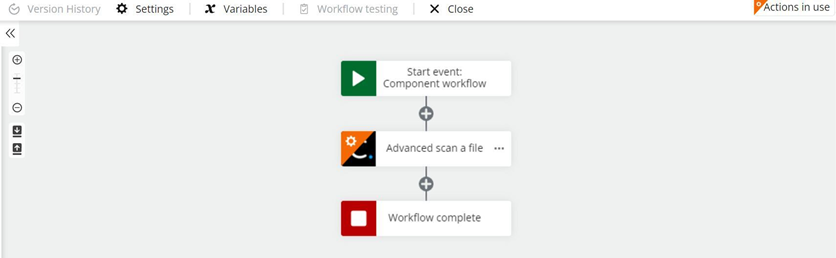
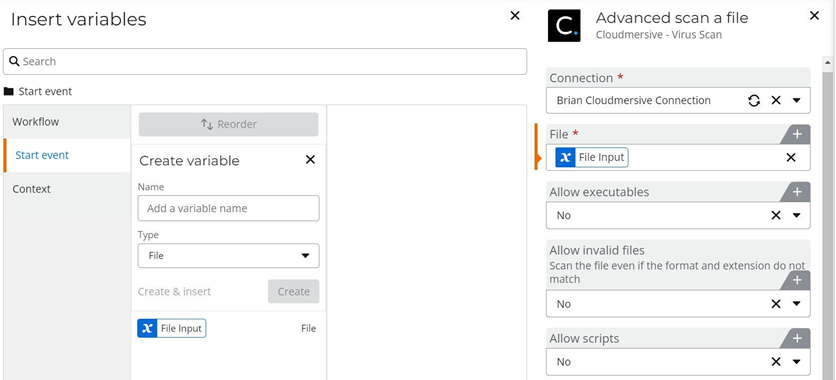
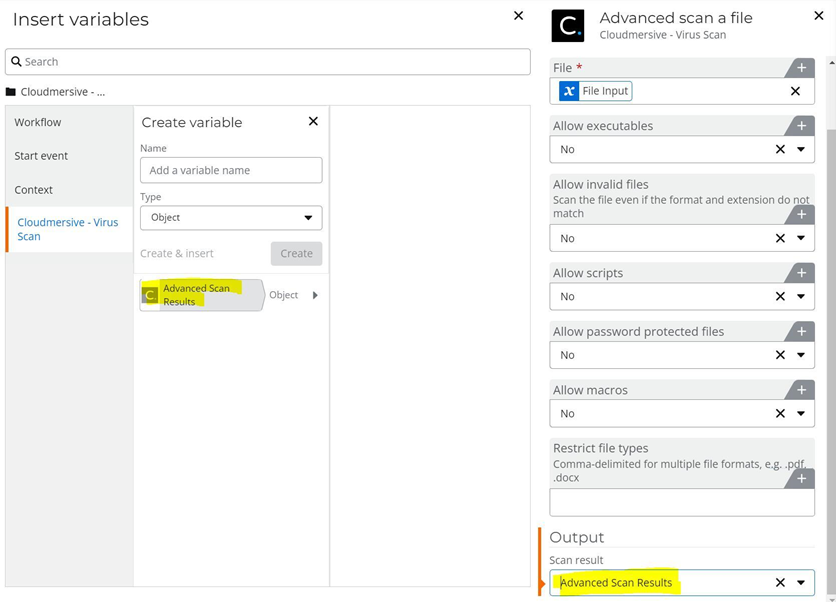
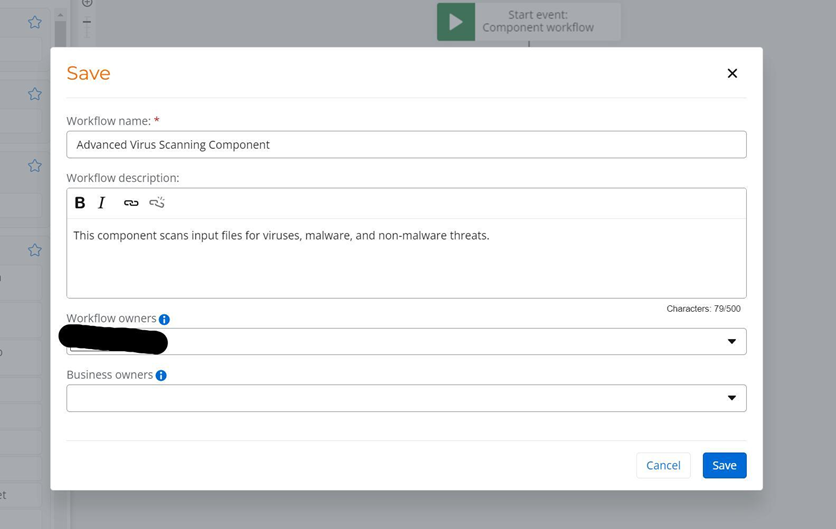
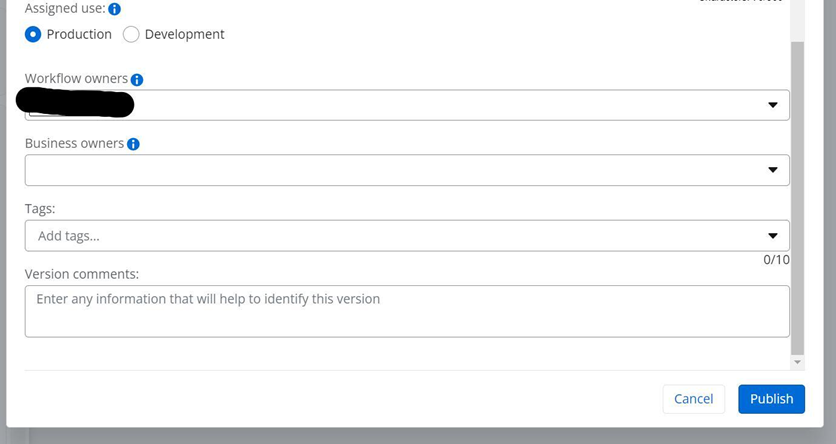
Nintex is a powerful no-code workflow automation platform featuring several built-in Cloudmersive API Connectors. In this article, we’ll walk through how you can set up a Component Workflow to scan files for viruses, malware, and non-malware threats with custom threat rules using the Cloudmersive Advanced Virus Scan API. After creating and publishing a Component Workflow in Nintex, we can call our new component from future workflows as a value-add service. 1 - Our first step is to create our new Component Workflow in Nintex. From the Workflow Dashboard, let’s click “Create Workflow” in the top left corner of the page. 2 - This brings us to the Designer page where we can incorporate new actions into our workflow. We should see a “search” tab on the lefthand side, two actions labeled “Start Event” and “Workflow Complete” in the center, and a configuration tab on the righthand side. To begin, let’s specify that we’re creating a Component Workflow. On the righthand side of our page where it says “Start Event,” let’s click on the “start from” dropdown and select “Component Workflow” from the list. 3 - Below that same tab, let’s click “Create Variable.” We need this variable to define the data that can enter this workflow when it’s called externally. When we click on “Create Variable,” we’ll open an expanded tab called “Variables” where we can quickly define new variables and select them when they’re needed later. Let’s name our first variable “File Input,” and then let’s navigate the Type dropdown to select “File” as our data type. When we’re done with that, let’s go ahead and click “Create” to save our variable. Our variable should show up like this: 4 - Now we can incorporate the Cloudmersive Advanced Virus Scan API Connector. To find it, let’s click on the plus sign below the “Start Event” action. This brings up a search field where we can type “Advanced Scan a File”. This will bring up the “Advanced Scan a File” action, and we can click on it to incorporate it into our workflow. 5 - Let’s now click on the “Advanced Scan a File” action, which brings up a configuration tab on the righthand side of the page. The first thing we need to do is create our Cloudmersive connection. Let’s click on the “Connection” dropdown and select “Add Connection”. We can give our connection a relevant name, and then we can authorize our connection by copying and pasting our Cloudmersive API key (found in the Cloudmersive Account page) into the API Key field. After that, let’s set the file input parameter to consume the “File Input” variable we created at the beginning of our workflow. Let’s click “Insert” on the File parameter, navigate to the “Start Event” variables, and then hover over the “File Input” variable and select “Insert”. Now we can review this connector’s Yes/No (Boolean) request parameters. These parameters are automatically set to “No”, which means executables, invalid files, scripts, password protected files and macros will all return a CleanResult: False value in the API response object. This is the default recommended setting, but we can of course change these threat rules to suit our needs. We can also include a comma-separated list of accepted file types in the “Restrict File Types” request parameter to limit acceptable files to a specific list of extensions. After we’ve customized our threat rules, we need to save the API output in its own variable. Let’s click on the “Select a Variable” dropdown and click “add variable.” Let’s then name our variable “Advanced Scan Results”, leave “Object” as the data type, and click “Create” to save our new variable. We can then select the “Advanced Scan Results” variable in the “Scan Result” dropdown. We can now access the results of our scan using the “Advanced Scan Results” variable in a variety of different ways. For example, we could use “Send an Email” feature built into Nintex to share the API response with us directly any time a file is scanned using this Component Workflow. 6 - The Component Workflow logic is now complete. We can save our workflow by clicking “Save” at the top of the page. This will bring up a window where we can name our workflow, provide some details about it, and click “Save” to include it in our Workflow Dashboard. After our workflow saves, we can publish it by clicking on “Publish” at the top of the page. This brings up a window which contains the Workflow Name and Workflow Description we created at the top. When we scroll down this window, we can assign our Component Workflow’s use for production or development, and at the bottom we can add tags and make version comments. When we’re finished, let’s click “Publish”. This officially launches our Component Workflow and makes it available for usage in other workflows. That concludes our Advanced Virus Scan API Component Workflow in Nintex! To learn more about using Cloudmersive API Connectors in Nintex, please do not hesitate to reach out to a member of our sales team. |
Sign Up Now or 

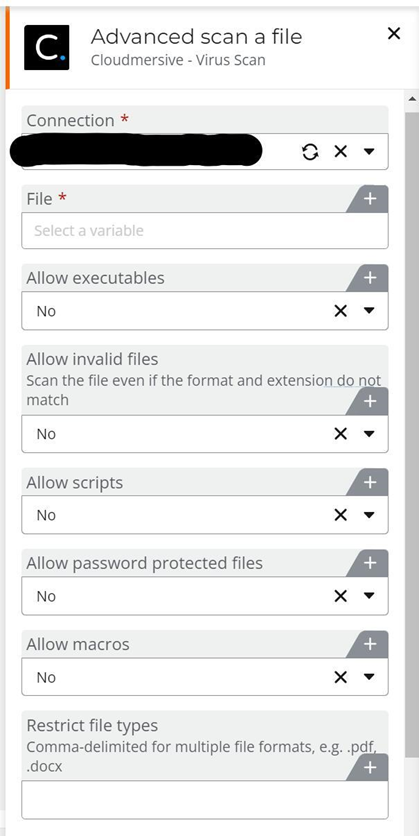
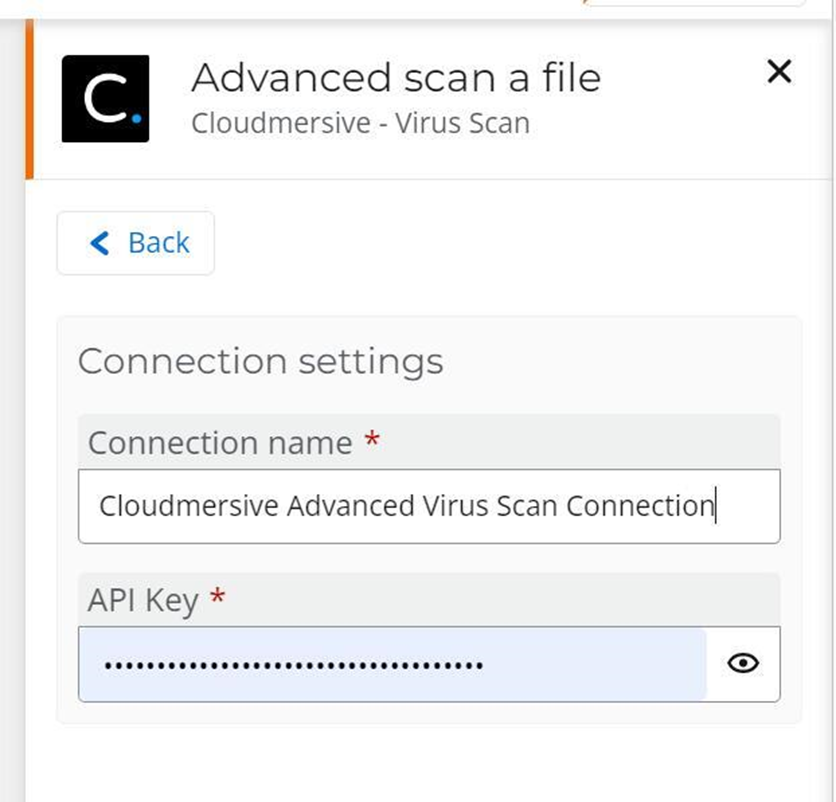
 Technical Articles

 Virus Scan APIs
 Content Disarm and Reconstruction APIs
 Spam Detection APIs
 Document Conversion & Processing APIs
 Document AI APIs
 Natural Language Processing (NLP) APIs
 Optical Character Recognition (OCR) APIs
 Image and Face Recognition and Processing APIs