
|
| How to Encrypt and Password Protect Zip Files using the Cloudmersive File Processing Connector in Power Automate |
| 9/7/2023 - Brian O'Neill |
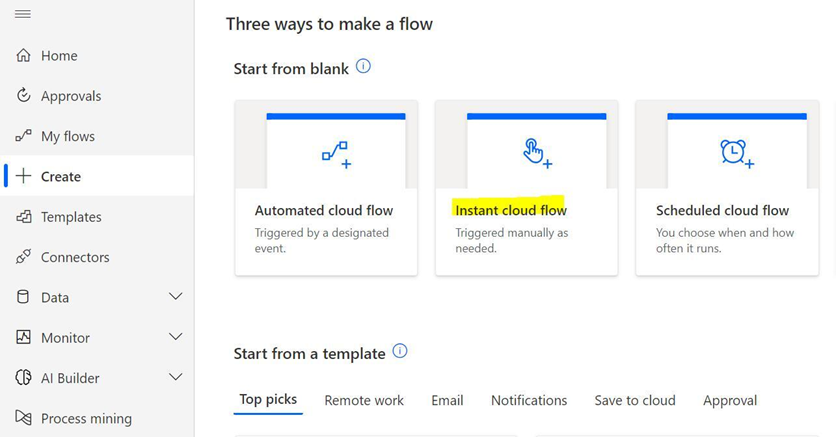
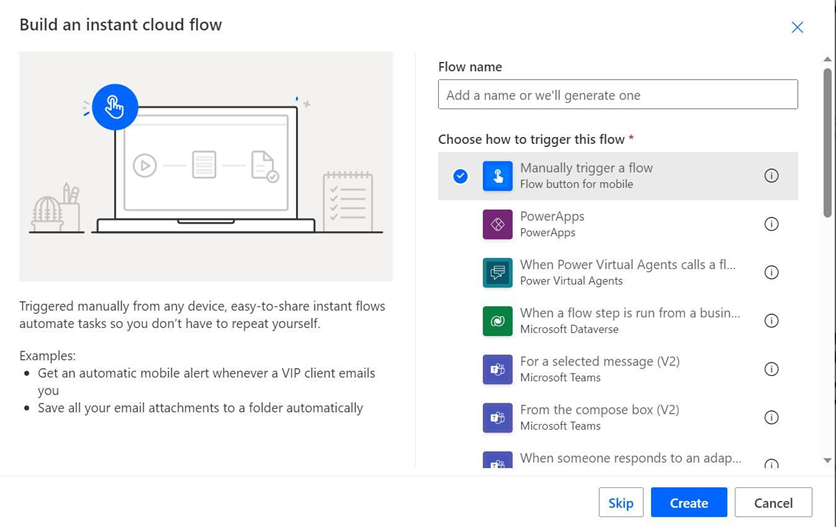
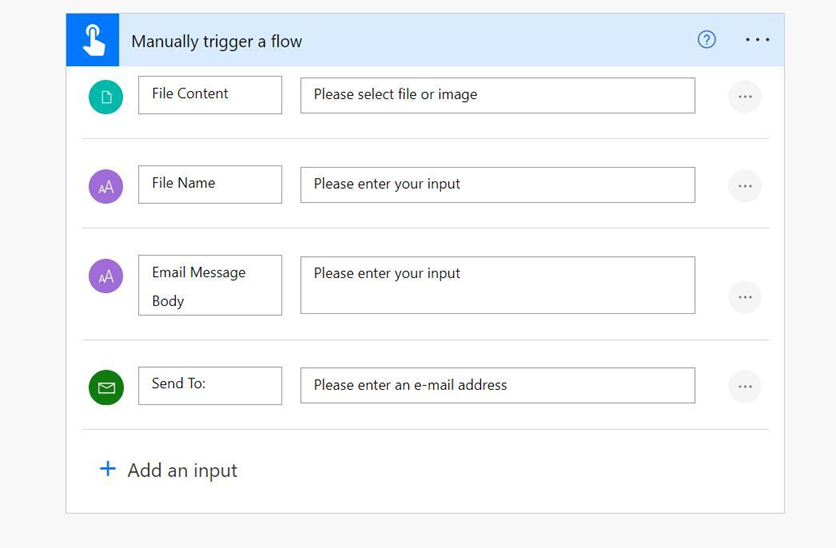
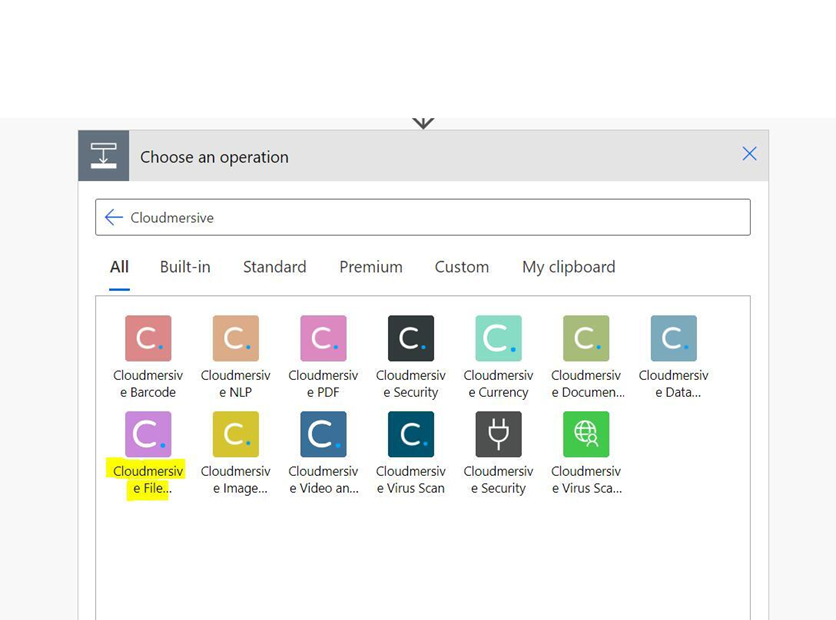
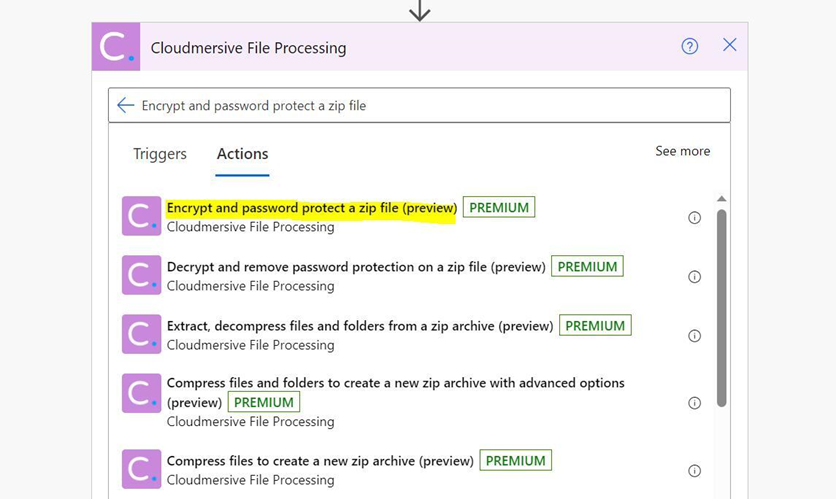
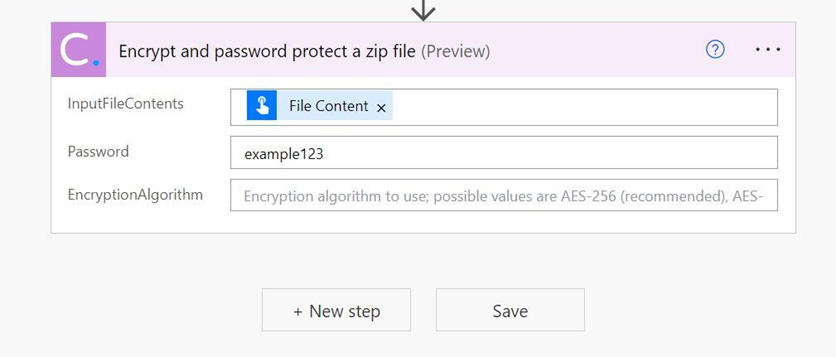
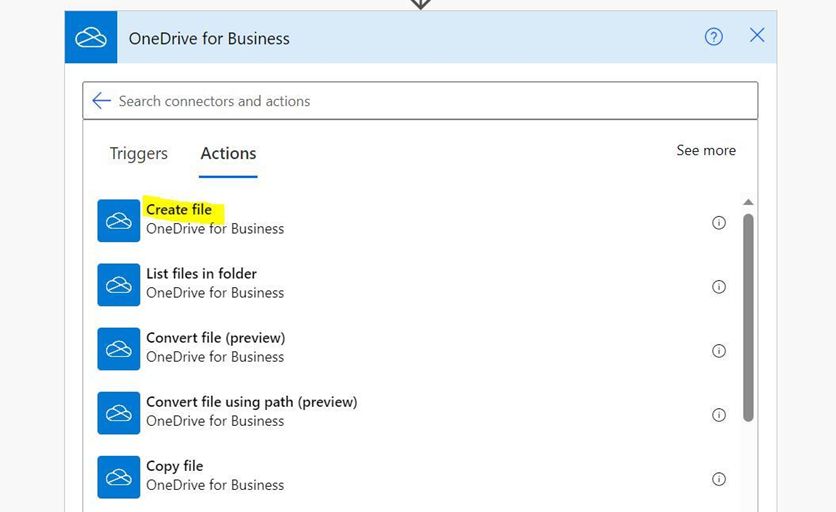
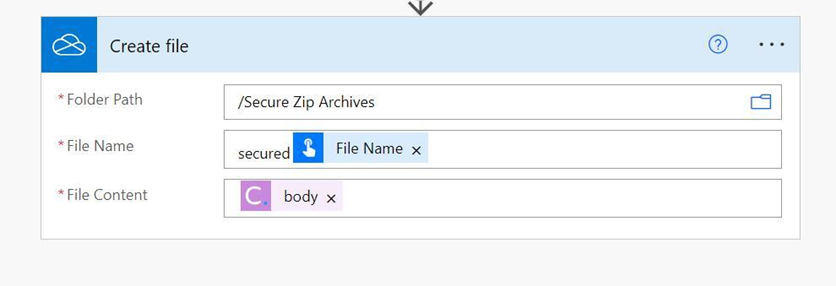
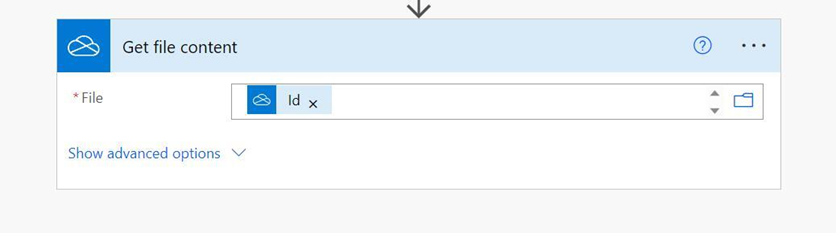
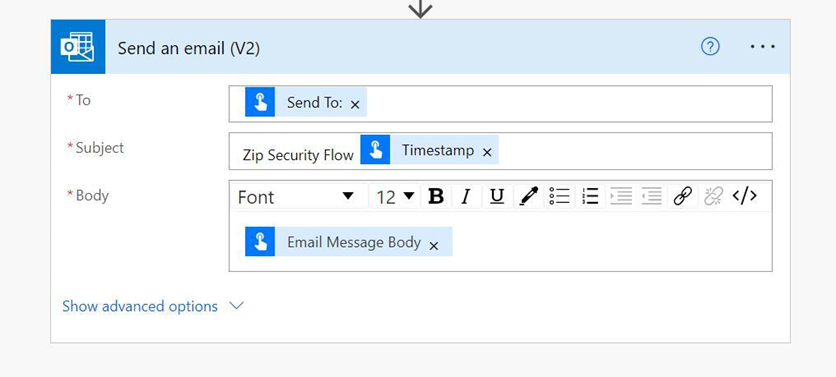
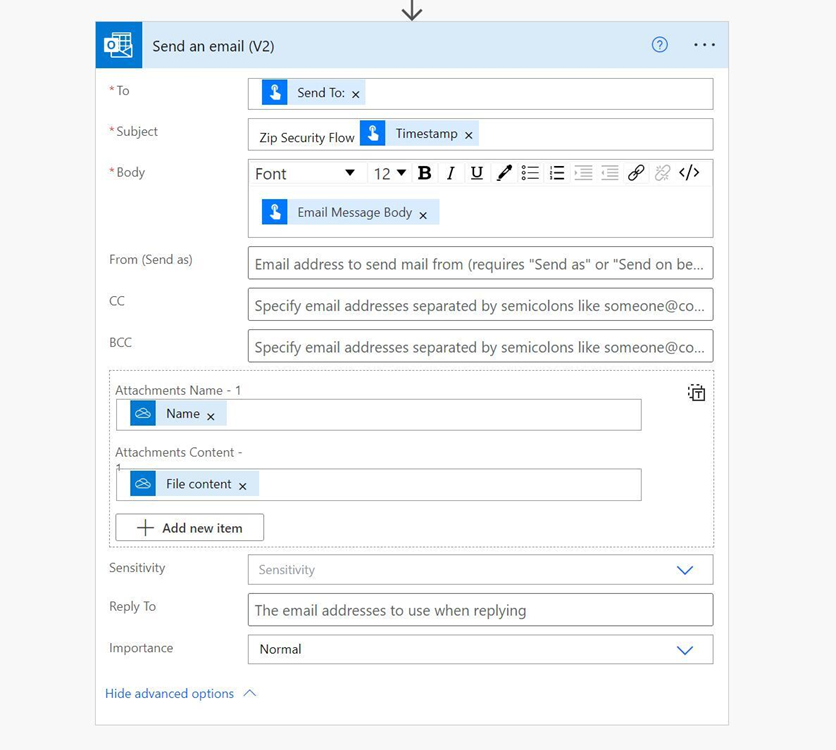
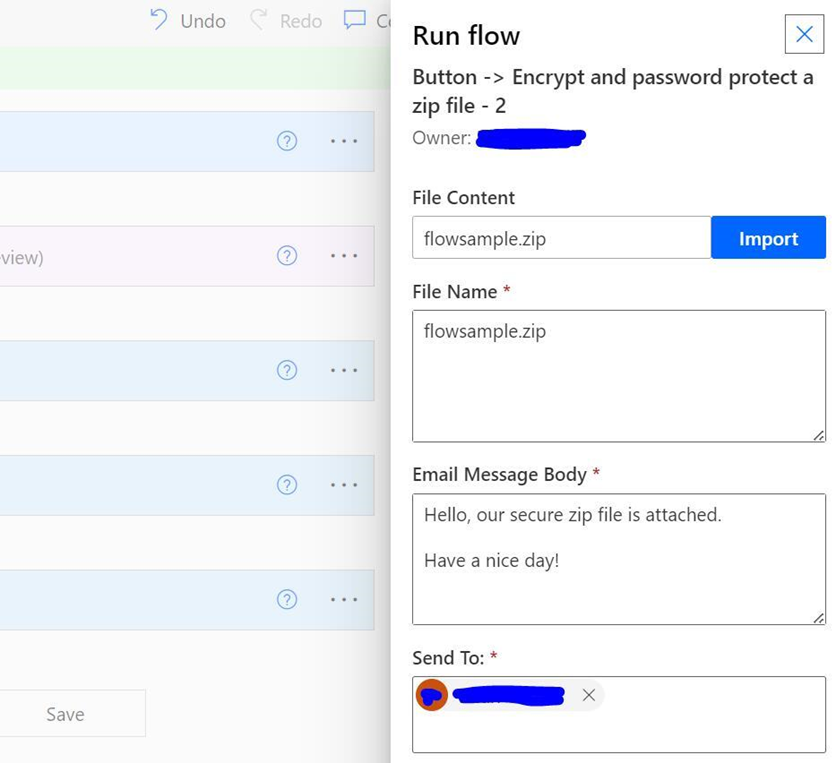
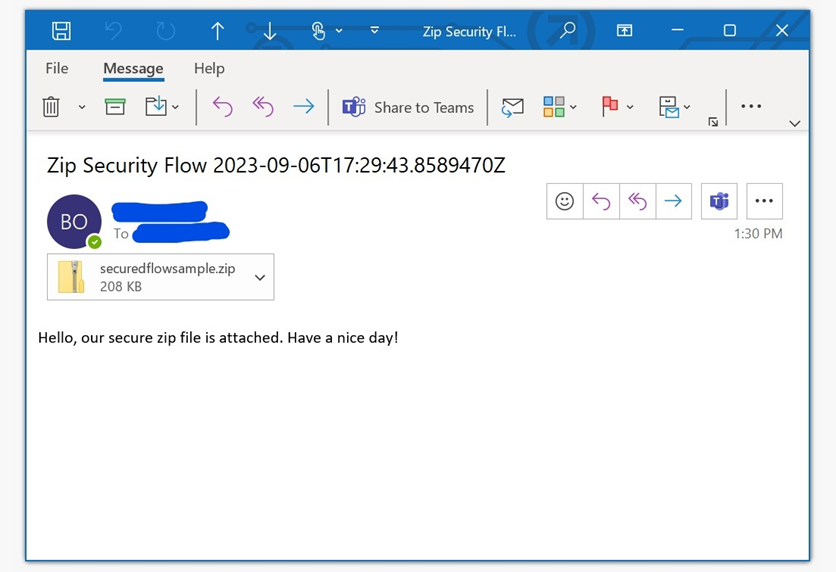
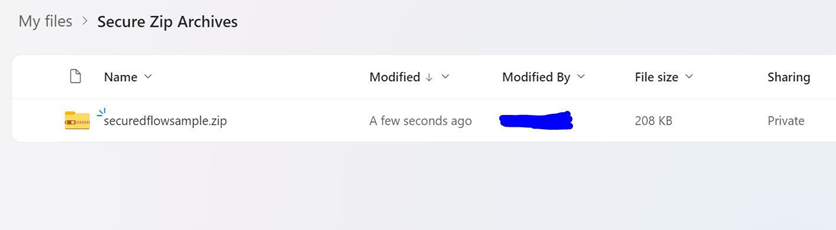
Cloudmersive APIs can limit our time capital expenditure like never before. Not only can we use these APIs as value-add services in our repetitive workflows, but we can also write our modified data directly to any of our applications, resulting in drastically more efficient (and often more accurate/reliable) processes. In Power Automate, we can accomplish all of this without writing a single line of code. We can use established authorization credentials to quickly take advantage of our myriad third-party applications, and we can leverage Cloudmersive Connectors to perform value-add services as files flow from one folder to another. In the below demonstration, we’ll walk through a simple & useful flow which uses the Cloudmersive File Processing Connector to secure a Zip archive with password-protection and encryption measures. On top of saving our secure file in a new storage location, we’ll ask our flow to email the resulting file to an address of our choosing. All we’ll need is a Cloudmersive API key copied to our clipboard, and we’ll be ready to consolidate our Zip security & file sharing workflows into a single button with simple input fields. 1 – Starting from the Power Automate home page, let’s click Create and “start from blank” by selecting an Instant Cloud flow. In the Instant Cloud Flow window, let’s select the option to Manually Trigger a Flow, and then let’s click Create so we can head to the flow diagram page. 2 – On the flow diagram page, let’s open our Manually Trigger a Flow step and click on Add an Input. Let’s incorporate a File Input field into our flow. When we eventually run our flow, we’ll be able to use this trigger to select our zip archive. Below our file input, let’s add three additional inputs. The first two will be Text inputs, and the final will be an Email address input. Let’s label our first text field File Name, and then let’s label our second text field Email Message Body. We can leave the email input blank, or we can name it something like Send To: if we want. 3 – Let’s now click New Step and type Cloudmersive into the search bar. From the list of Cloudmersive connectors below, we want to select the Cloudmersive File Processing connector with the purple thumbnail. If we haven’t used this connector before, we’ll encounter the connector authorization step before we reach the actions list. We just need to give our connection a name, and after that we can paste the API key we copied from our account page into the API key field. If we don’t have an API key yet, we can get one for free by registering a free account on the Cloudmersive website, and we’ll get a limit of 800 API calls per month with no additional commitments. Once we reach the actions list, let’s search for the action called Encrypt and Password Protect a Zip File. We should see this action at the top of the actions list, and we can select it from there. To configure this action, we need to enter file content from our trigger step in the first field, and then we need to enter our choice of password and encryption algorithm in the following two fields. The default & recommended encryption algorithm is set to AES-256, but we can elect to change that to either AES-128 or PK-Zip if we want. We’ve left the encryption field blank in the below example so our flow will default to the recommended algorithm. 4 – Now that we’ve applied password protection and encryption security measures to our Zip file, let’s click New Step and search for a Create File action. Since the file we’re using in this demonstration will come from a SharePoint folder, we’ll be saving it in a OneDrive folder called Secure Zip Archives so we don’t have to manually upload it later. As a result, we’re going to select the OneDrive For Business Create File action and configure our request accordingly. When we designate our new file’s name, let’s type “secured” followed by the dynamic content labeled File Name we created in our trigger step. This way, we’ll uniformly change the file every time we perform this operation. In the File Content field, let’s make sure we select output from our Cloudmersive File Processing action. 5 – Now that we’ve officially created our new file, we can go about formulating the email we’ll send out at the end of our flow. Before we do that, however, we’ll first need to get our new file’s content. Let’s click New Step and search for the Get File Content action associated with the OneDrive for Business connector. We need our new file’s unique identifier to satisfy this action’s request parameter, and we can supply that by selecting dynamic content labeled Id from our Create File step. Let’s now click New Step one last time and search for the Office 365 Outlook Connector action called Send an Email (V2). Within this action, let’s utilize the dynamic content we created in our trigger step to customize our email step-by-step. For our email subject, we can either enter standardized reusable text or supply our file name along with other details about the flow run. This depends entirely on our unique preferences. To attach our Zip file to this email, let’s click on the Show Advanced Options dropdown and use dynamic content from our Create File and Get File Content steps to satisfy our Attachments Name and Attachments Content fields. We should include the dynamic content labeled File Name and File Content respectively. 6 – We can now save our flow and run a test. When we click Test in the top corner of the page, let’s select the option to Manually trigger our flow, and then let’s confirm our connections directly after that. On the Run Flow tab, we’ll have the ability to supply a file, enter our file name, customize our email message body, and finally enter the email we want to send our file to. When we run our test, our recipient should receive the following email: On top of that, our OneDrive folder should hold a copy of our new file: In one simple flow, we quickly consolidated a repetitive process into one simple & reusable button, with our Cloudmersive File Processing Connector performing a key value-add service in the middle. Easy! For more information about Cloudmersive APIs and Cloudmersive Power Automate Connectors, please do not hesitate to reach out to a member of our sales team. |
Sign Up Now or 

 Technical Articles

 Virus Scan APIs
 Content Disarm and Reconstruction APIs
 Spam Detection APIs
 Document Conversion & Processing APIs
 Document AI APIs
 Natural Language Processing (NLP) APIs
 Optical Character Recognition (OCR) APIs
 Image and Face Recognition and Processing APIs