
|
| How to Extract Receipt Fields and Tables using Document AI in Power Automate |
| 11/6/2025 - Brian O'Neill |
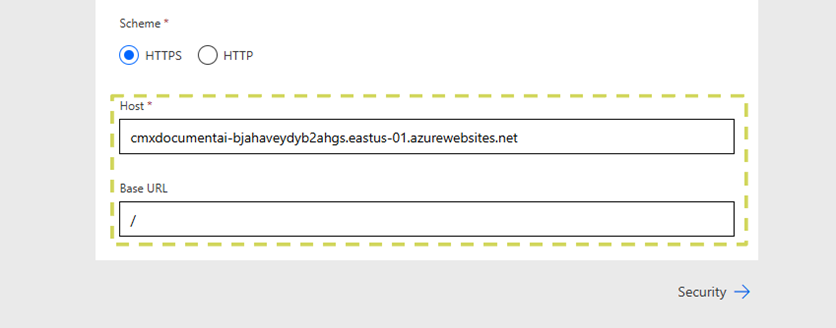
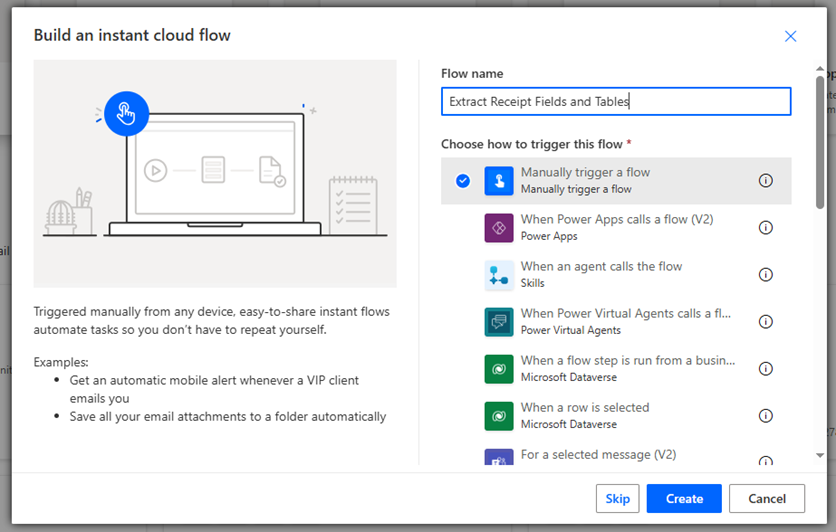
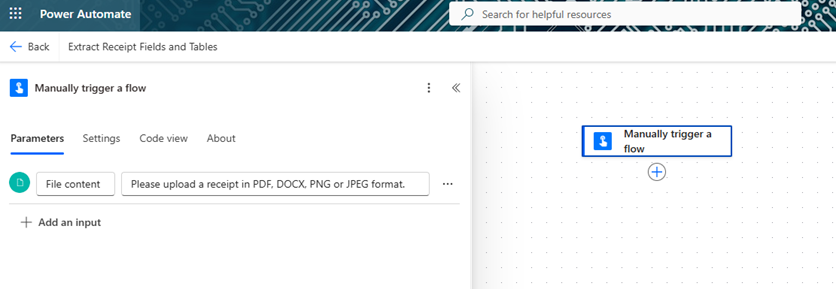
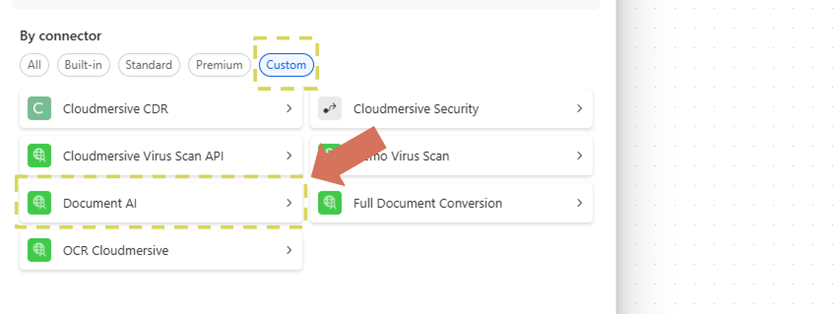
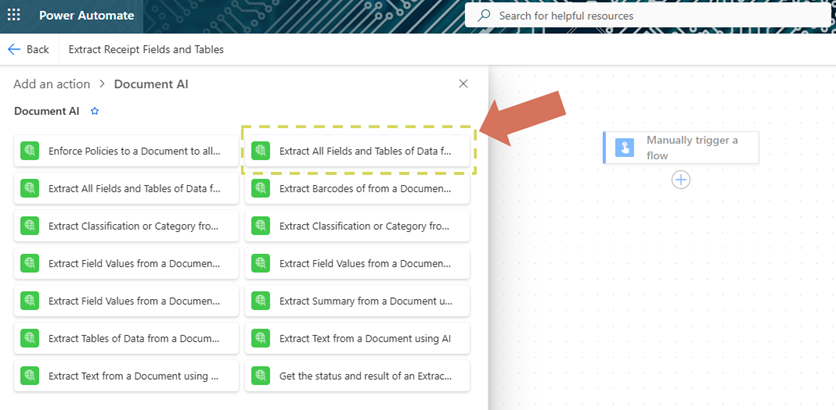
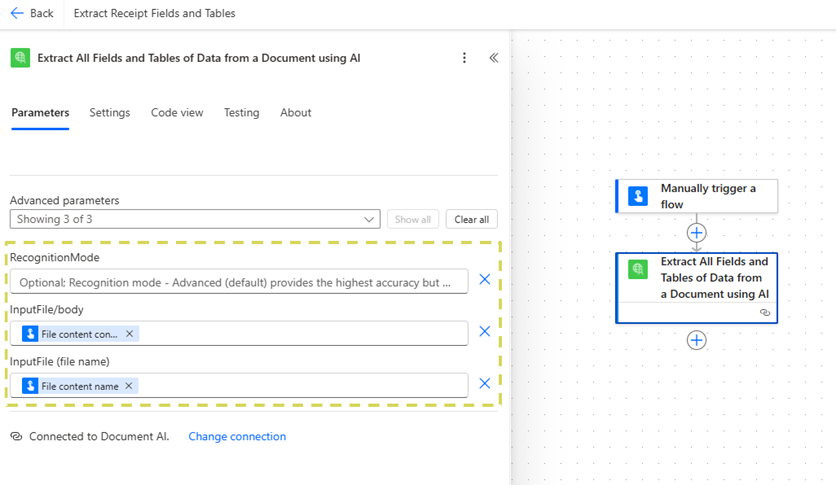
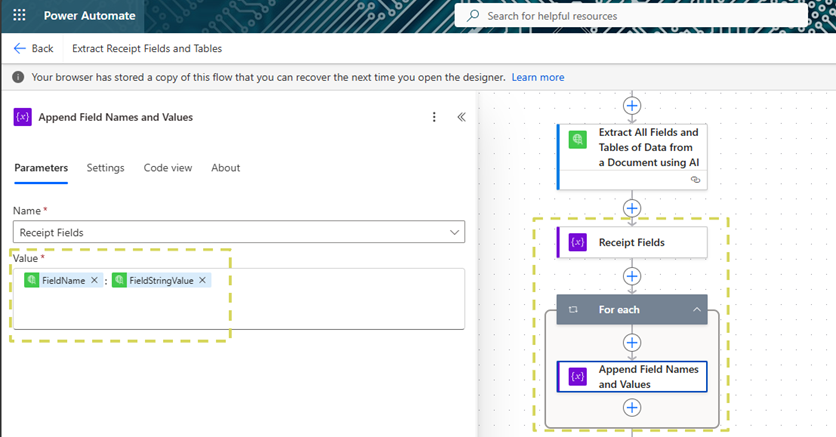
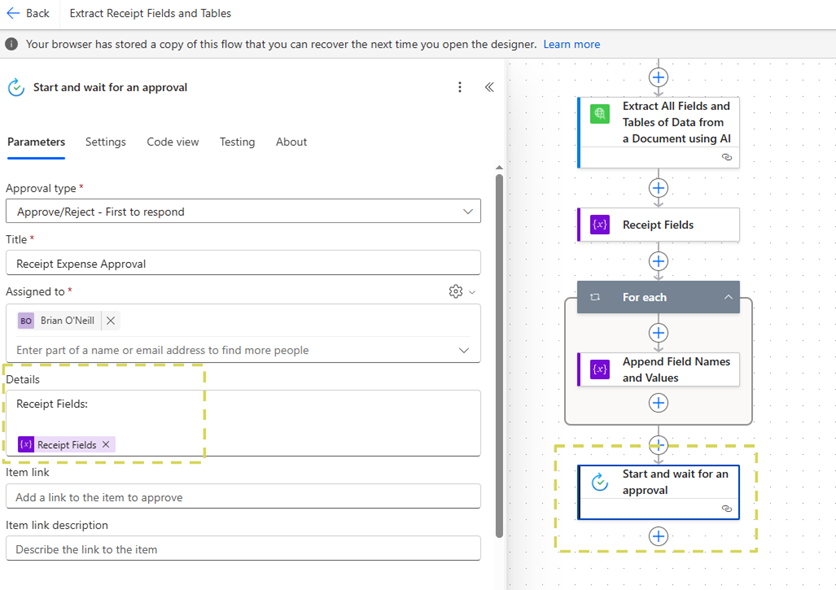
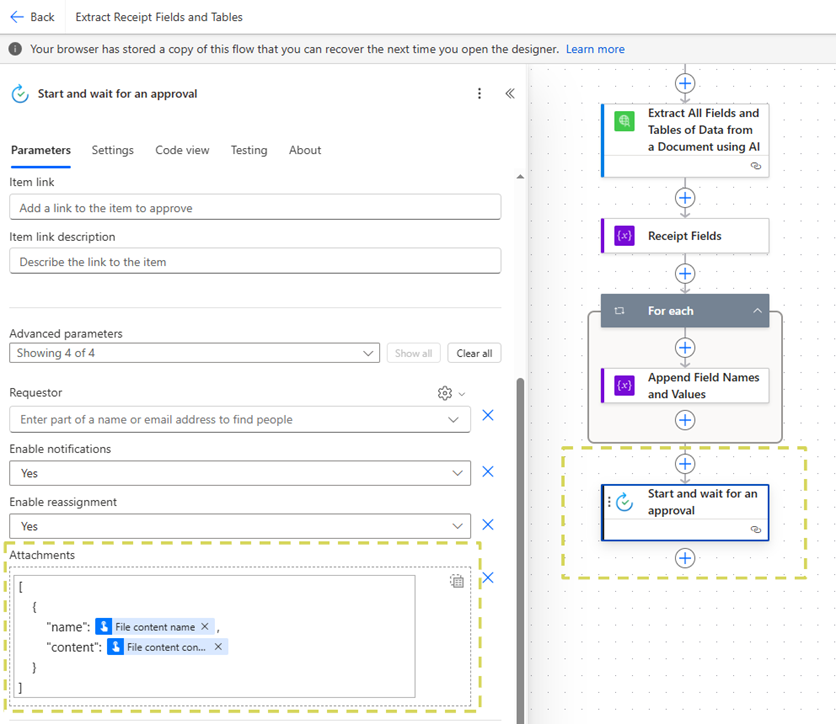
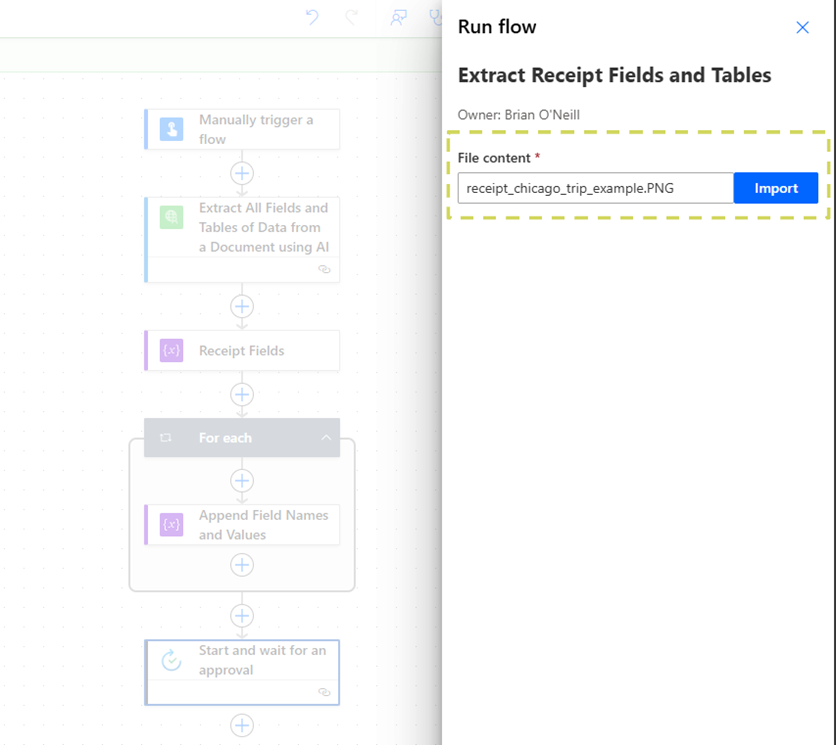
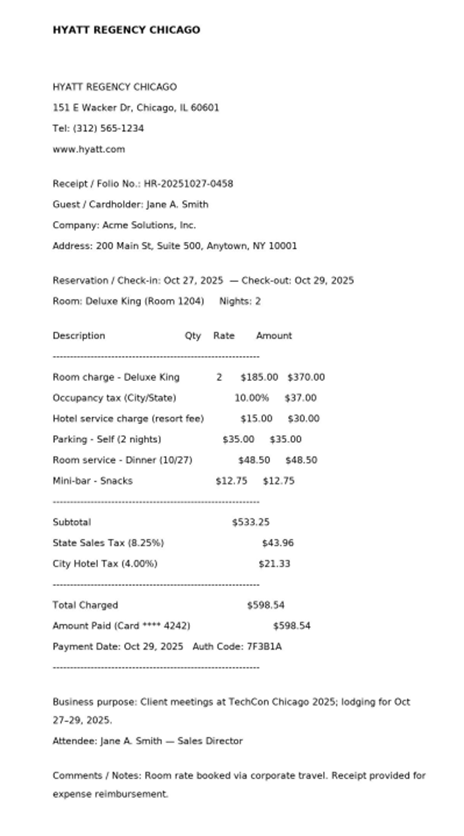
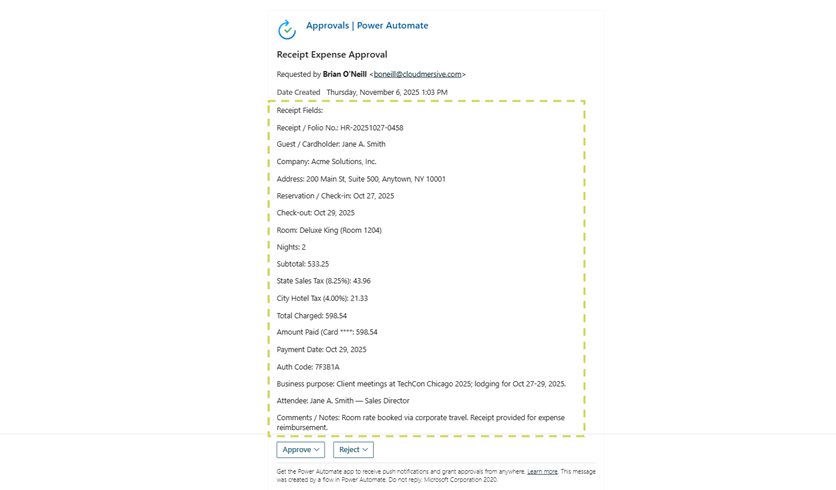
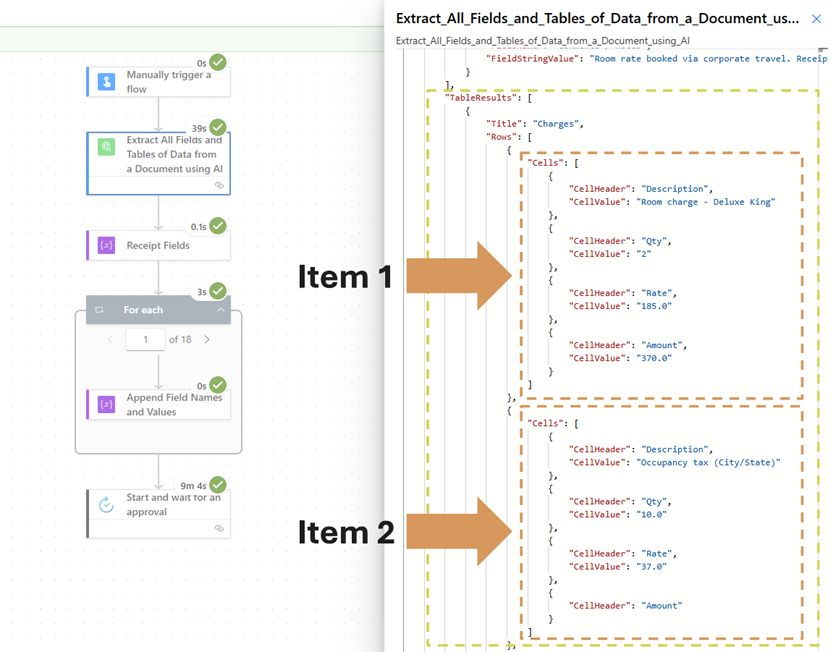
Cloudmersive Document AI is here, and it’s ready to revolutionize your document processing workflows. Document AI empowers enterprises to intelligently summarize or categorize document contents, retrieve form responses, pull data from tables, and extract fields of data from invoices, receipts, tax forms, and other standard documents. Cloudmersive Document AI Field and Table Extraction in Power AutomateThe Document AI API can be imported to Power Automate as a Custom Connector, and from there it can be plugged into any new or existing document processing workflow with ease. In this article, we walk through an example Power Automate flow which takes advantage of the Document AI API’s field and table extraction capabilities to process items from an example “employee receipt” and return that data as a JSON object array. This extremely simple flow allows us to ready receipt data for storage in an ERP, CRM, or database of any kind, and it also drastically simplifies our ability to run approval workflows in Power Automate. Uploading a Custom Document AI Connector to Power AutomateBefore we begin walking through our example field and table extraction workflow in Power Automate, we’ll first address that we’re using the Document AI API as a custom connector in this case. Uploading any Cloudmersive API to Power Automate as a custom connector is as simple as 1) uploading the API spec to the power platform via JSON file or URL and 2) setting a host endpoint and base path in the General information tab of the custom connector editor. If we’ve deployed the Document AI API to a private or managed instance endpoint, we can set that endpoint as the host in our custom connector to take full advantage of our infrastructure in Power Automate. Extracting Fields and Tables from a Receipt in a Power Automate FlowAfter we’ve created our Document AI custom connector, we can immediately begin designing our AI field and table extraction flow. In this example, we’ll build an We’ll configure our We’ll now place our Document AI field and table extraction action directly after our manual trigger or input. To find this action, we’ll first navigate to the On the Document AI actions list, we’ll find and select the action titled We’ll now structure our field and table extraction request. This part is extremely simple. We only have 3 request parameters to worry about, and 2 of them are related to our file input. The After just two quick steps, our flow is already functional. All that’s missing are subsequent steps which process or share our data in some way. In this example, we’ll create a basic First, we’ll create a Next, we’ll add a We’ll include the uploaded file as an attachment in this approval as well. We’ll now save our flow and test it with an example receipt PNG. The file used in this test is displayed below for reference: Reviewing Our ResultsWhen our flow finishes running, we’ll receive a detailed approval request in our email inbox outlining every field name and field value from our input receipt. We can compare this with our example receipt to understand how our data is parsed. As we can see, each field was correctly parsed and shared within the approval message. Of course, receipt fields are only half of what the In the above screenshot, we’ve highlighted the Document AI fully parses all the relevant information provided on any receipt and structures that data cleanly and accurately in its response object. This drastically reduces the amount of work we need to do to correctly parse information from receipts in Power Automate approval workflows. ConclusionIn this article, we learned how to easily extract fields and tables from a receipt using the Document AI Including Document AI in our Power Automate flows immediately empowers our document processing capabilities. We can easily extract and subsequently share or store the data we need from receipts without needing to know anything about the structure of the receipt ahead of time. For expert advice on using the Cloudmersive Document AI API in Power Automate, please reach out to a Cloudmersive representative. |
Sign Up Now or 

 Technical Articles
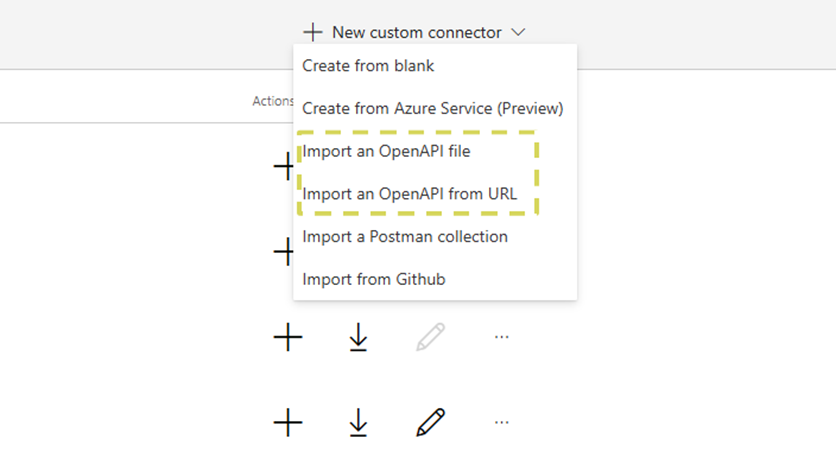


 Virus Scan APIs
 Content Disarm and Reconstruction APIs
 Spam Detection APIs
 Document Conversion & Processing APIs
 Document AI APIs
 Natural Language Processing (NLP) APIs
 Optical Character Recognition (OCR) APIs
 Image and Face Recognition and Processing APIs