Cloudmersive Document AI is here, and it’s ready to revolutionize your document processing workflows.
Document AI empowers enterprises to intelligently summarize or categorize document contents, retrieve form responses, pull data from tables, and extract fields of data from invoices, receipts, tax forms, and other standard documents.
Cloudmersive Document Classification
The Document AI API is now available on the Power Automate platform as a premium built-in connector. That means Cloudmersive customers can now begin implementing any Document AI action into their new and existing document processing workflows with ease.
In this article, we’ll walk through an example Power Automate flow which takes advantage of the Document AI API’s document classification capabilities to distinguish between one of several unique document types we expect our workflow to process.
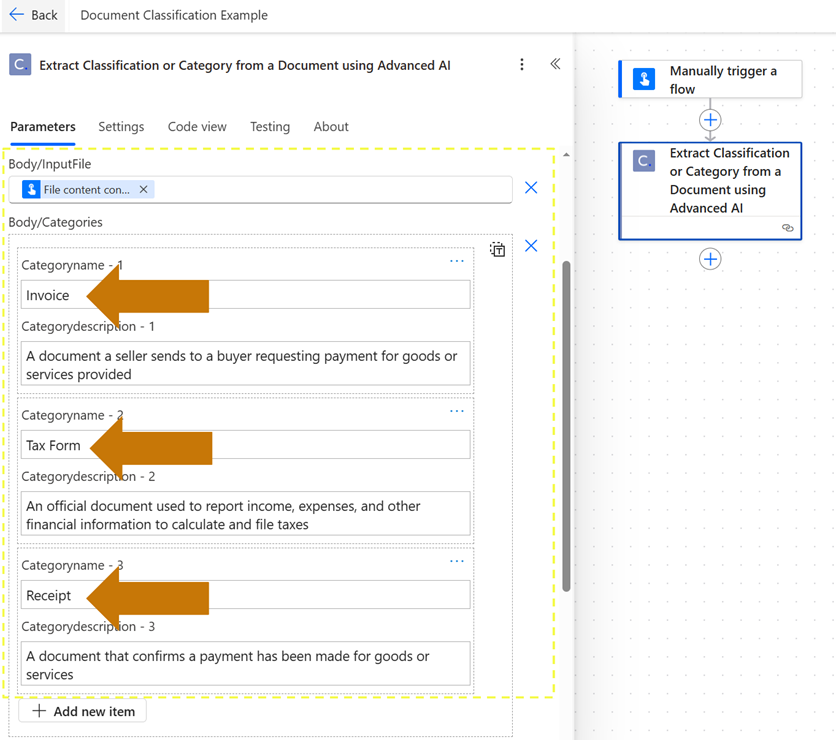
To be clear, when we say “document types”, we don’t mean document formats (though Document AI does support a wide range of unique formats). Document AI intelligently identifies categories of documents (e.g., invoices, tax forms, receipts, etc.) based on an unlimited number of possible categories and descriptions which we supply at runtime (shown in the example image below). This means we can expand our flow inputs to cleanly support a much wider variety of business documents at once.
Classifying (or Categorizing) Documents in a Power Automate Flow
We’ll begin building our document classification workflow by initiating a manually triggered Instant cloud flow in Power Automate.

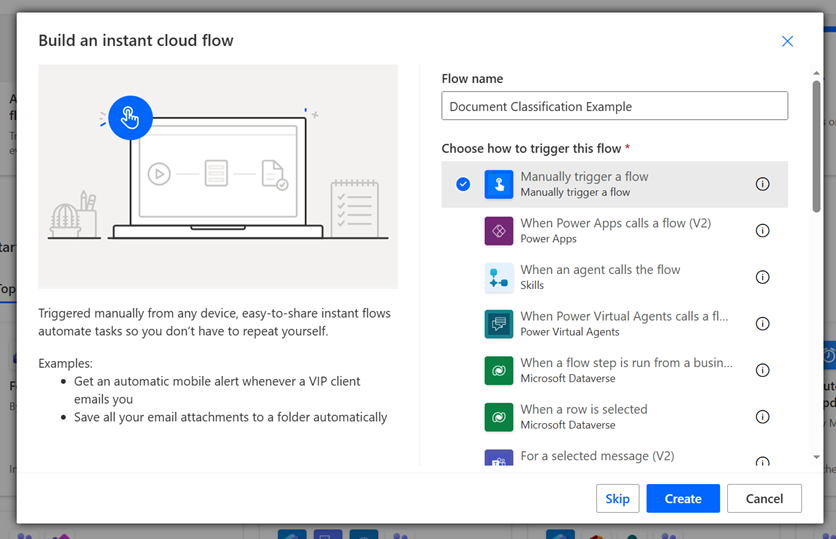
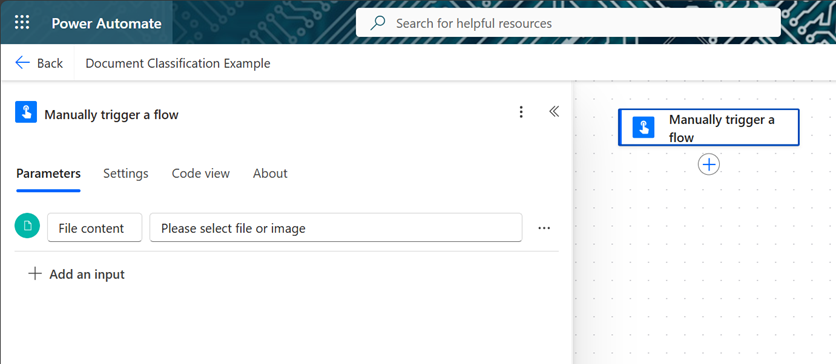
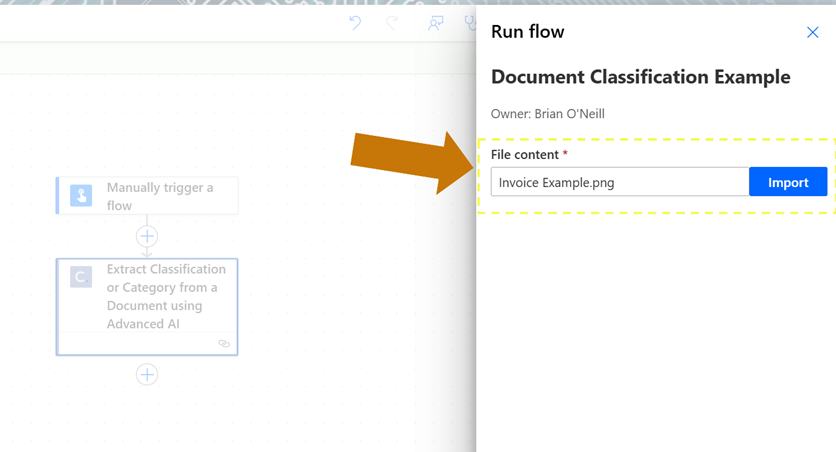
To simplify our document input, we’ll open the Manually trigger a flow box and select the option to include a File input field. This will allow us to easily submit a test document at runtime.
Next, we’ll add a new action and search for the Document AI connector. This connector has a grey background with a white Cloudmersive logo on top. Once we locate it, we can hit the Favorite button (which appears as a star shape next to the connector name) so we don’t have to go looking for it again.
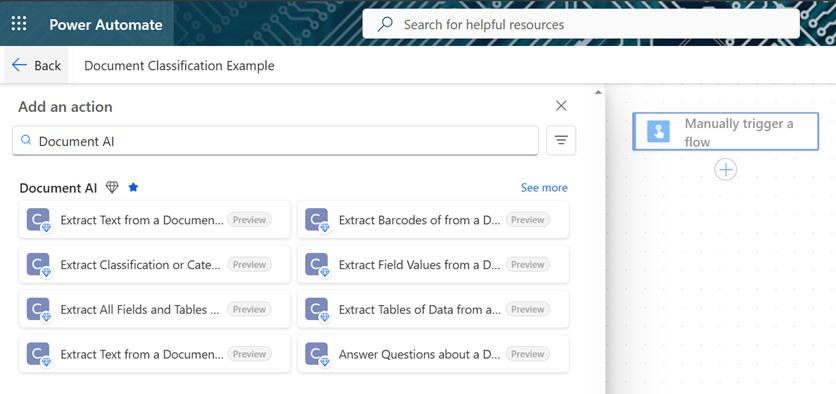
We’ll now click See more to view the actions list.
If it’s our first time using Document AI in Power Automate, we’ll need to create our connection and provide our API key at this stage. We can do this by copying the API key from our Cloudmersive Management Portal and pasting it in the API key field.
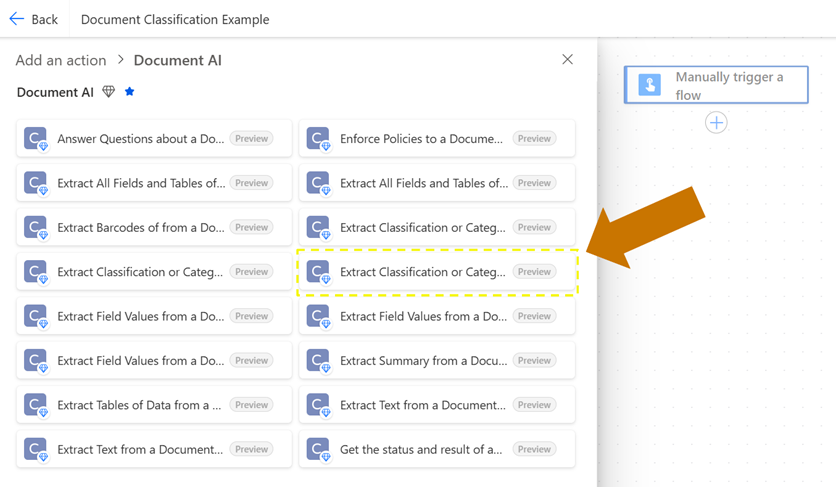
After that, we’ll locate and select the action titled Extract Classification or Category from a Document using Advanced AI. This can be found on the right-hand side of the actions list 4 down from the top. We’ll want to avoid similar looking actions above and to the left of this one (these provide a more simplistic version of the API and a batch job version respectively).
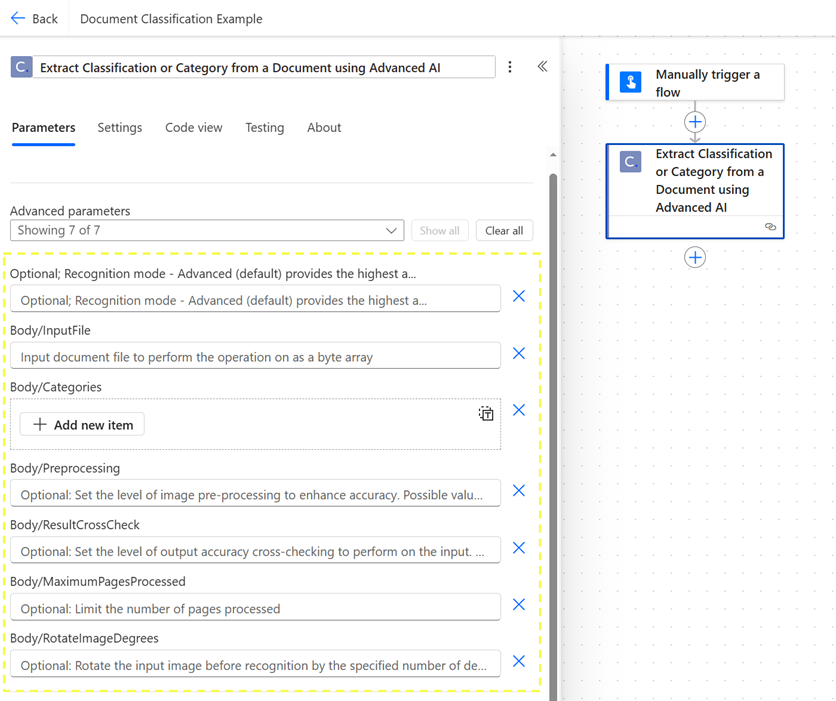
We’ll now configure our Extract Classification request. We’ll start by reviewing each input parameter in detail. It’s important to note up front, however that all parameters except for the file input and categories array can be left at their default values.
Recognition Mode - this parameter allows us to choose whether to prioritize accuracy or response time in our Document AI request. Our two options are:
a. Advanced - this is the default setting and prioritizes accuracy
b. Normal - this is an optional setting which prioritizes speed to some extentBody/InputFile - this parameter accepts our file byte array. This data type corresponds to the file input trigger we created at the outset of our flow.Body/Categories - this parameter accepts our input classification array. Clicking Add new item allows us to provide as many Categoryname and (optionally) Categorydescription pairs as we want in our request. Document AI compares the category names and descriptions with the input document contents to accurately distinguish between document types.Body/Processing - this parameter allows us to change the level of image pre-processing (for flat document image inputs like PNG or JPG) to a custom setting. Our options are:
a. Auto - this the default setting and attempts to determine the correct amount of pre-processing for each input file
b. SmoothEdges - this smooths harsh edges to enhance recognition accuracy
c. SmoothEdgesPlus - this smooths harsh edges to a higher degree
d. Compatibility - this specifically improves compatibility with advanced PDF features
e. None - this avoids preprocessing entirelyResultCrossCheck - this parameter allows us to set the level of output accuracy cross-checking to perform on the input document. Our options are:
a. None - this is the default setting and avoids crosschecking entirely
b. Advanced - this performs an extensive crosscheck
c. Ultra - this performs a more extensive crosscheck (at the expense of much slower response times)
d. Hyper - this performs the most extensive crosscheck (at the expense of the slowest possible response times)Body/MaximumPagesProcessed - this parameter allows us to limit the number of pages processed in any given document via integer input.Body/RotateImageDegrees - this parameter allows us to correct document rotation by specifying a number of degrees to rotate input documents before processing (useful when documents are expected to be rotated in a predictably incorrect way at scale).
Below, we’ve filled out an example request with our input file and Body/Categories array filled out (all other parameters have been left at their default values):
We’ll now run two quick tests with example documents. First, we’ll test our flow with an invoice document.

When our flow finishes running, we’ll open the outputs and review the response JSON.

As we can see, our simple response object correctly indicates we submitted an Invoice document at runtime. The ConfidenceScore attribute shows that the model was 99% confident this classification was correct.
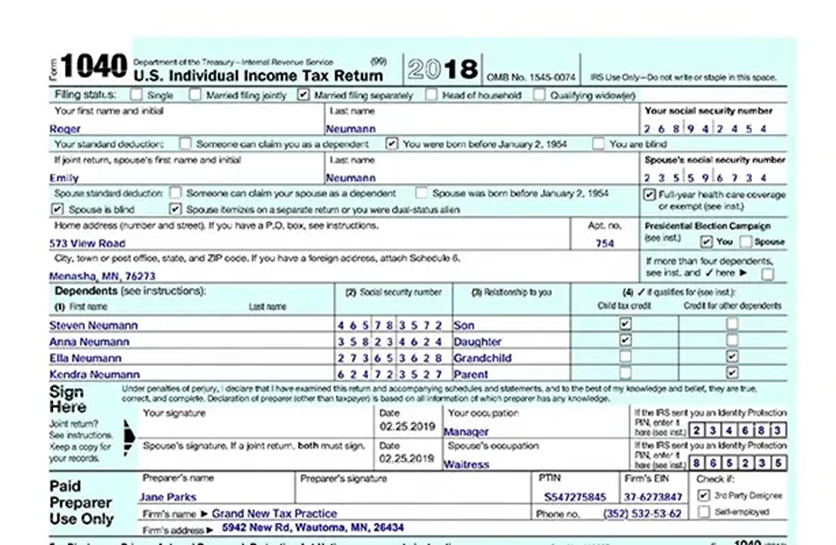
Now we’ll run a second test with a tax form document (1040 form).

When our flow finishes running, we’ll once again open the outputs and review the response JSON.
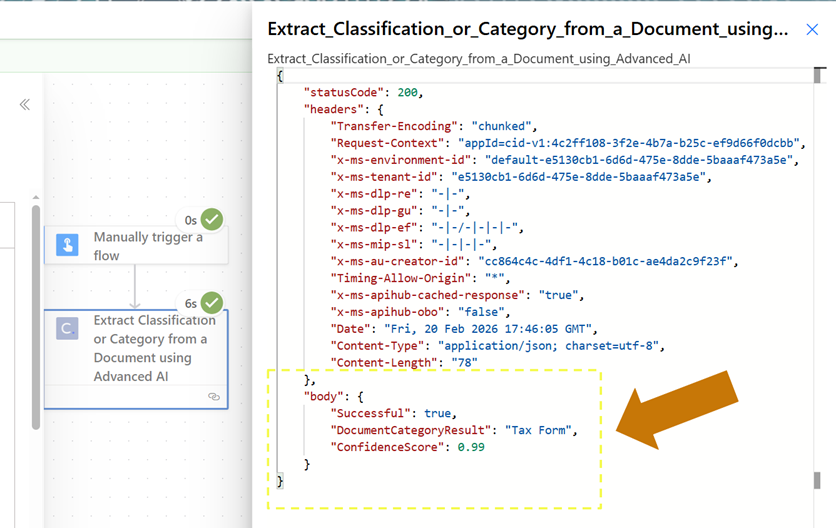
As we can see, our new response object correctly indicates we submitted a Tax Form document at runtime. The ConfidenceScore attribute is once again very high, indicating the model was 99% confident in its classification.
With the help of the DocumentCategoryResult response, we can now ask our Power Automate flows to intelligently distinguish between a variety of unique document types at runtime. This gives our flows an immense amount of flexibility: we no longer need to tightly control document types at runtime to avoid processing documents incorrectly, and as a result we can reduce the number of unique flows we have to create.
Conclusion
In this article, we learned how to easily extract document classifications using the Document AI Extract Classification or Category from a Document using Advanced AI action. Our example flow runs returned clear DocumentCategoryResult and ConfidenceScore responses which correctly indicated the test documents we used at runtime.
Including Document AI in Power Automate instantly improves our ability to process and validate our documents. With Document AI, we can easily determine which documents move forward to specific downstream automation workflows by supplying our own custom list of category options.
For expert advice on using the Cloudmersive Document AI API in Power Automate, please reach out to a Cloudmersive representative.


 Technical Articles
 Virus Scan APIs
 Content Disarm and Reconstruction APIs
 Spam Detection APIs
 Document Conversion & Processing APIs
 Document AI APIs
 Natural Language Processing (NLP) APIs
 Optical Character Recognition (OCR) APIs
 Image and Face Recognition and Processing APIs