Overview
Converting Excel to PNG primarily gives us a static representation of our spreadsheet data. Unlike Excel to PDF and Excel to JPG conversions, though – which also accomplish that same primary goal and are just as frequently carried out – Excel to PNG both returns a considerably lighter-weight output and supports image background transparency. These advantages respectively allow us to quickly load our data images on web pages and layer our data atop myriad backgrounds.
Converting Excel to PNG with Cloudmersive
The Cloudmersive Convert API makes it easy to automate Excel to PNG conversions in our Python applications. Using ready-to-run code examples from the Cloudmersive Swagger UI page (API Console), we can quickly implement the Convert API Python SDK in our project and structure our API request with only minor changes to the example code. We can do all this with any level of Cloudmersive API key, from free-tier (800 API calls/month) to Enterprise-tier (indefinite API call volume & hyper-scalable infrastructure).
In this article, we’ll explain how to convert Excel files to PNG arrays using the complementary code available to us on the Cloudmersive API Console. We’ll build an example conversion workflow in Google Colab (a hosted Jupyter Notebooks environment), and we’ll explain how to iterate through the API response object to correctly write our resulting PNGs to new files on our local path.
Locating Convert API Code Examples
We’ll find the code examples we need for all 13 versions of the Convert API client on the API Console page.
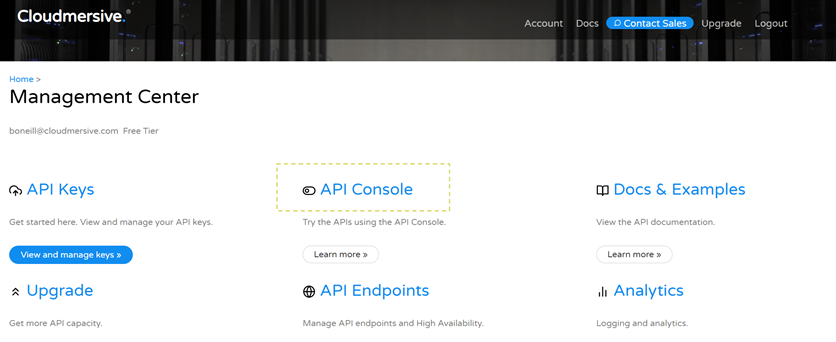
After we navigate to the API Console page in our Cloudmersive Management Portal (CMP), we’ll click on the Convert API link.
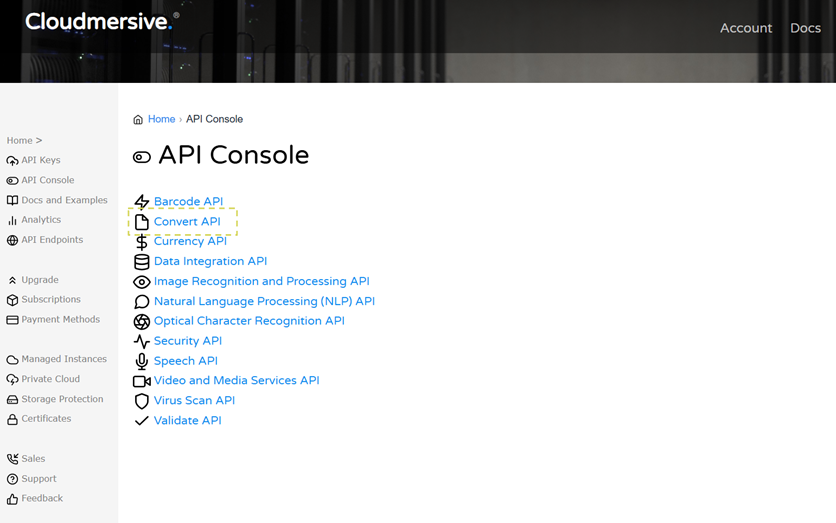
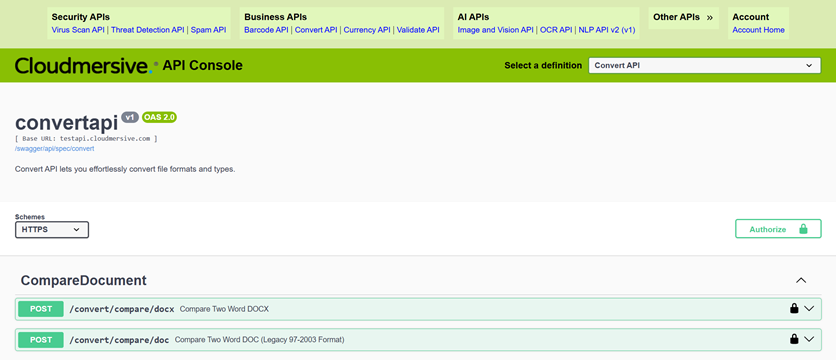
As mentioned earlier, the API Console is a Swagger UI site. It’s built from the OpenAPI URL specifications for each API on the Cloudmersive API platform; we’ll find easy-to-navigate pages like this for the Virus Scan API, Image Processing API, OCR API, and more.
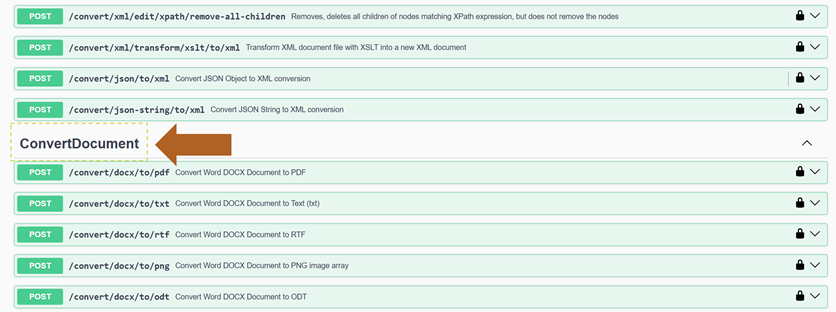
We’ll find the specific Excel to PNG conversion operation we’re looking for on the ConvertDocument path. This operation is titled Convert Excel XLSX spreadsheet to PNG image array.
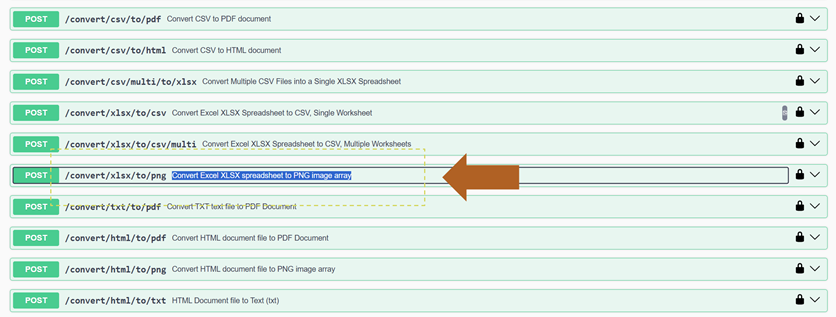
When we open the Convert Excel XLSX spreadsheet to PNG image array tab, we’ll find some brief documentation and the option to try out a conversion without writing any code.
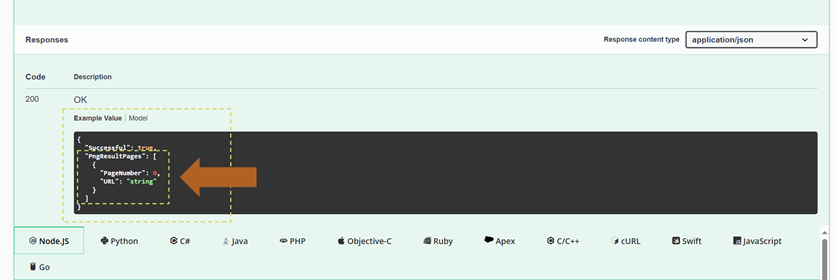
Below this, we’ll notice an Example Value API response model. We should pay close attention to this response structure. We’ll notice that the response object primarily consists of an array called ”PngResultPages”, which contains both a ”PageNumber” (int) and ”URL” (str) attribute. Asking our Python application to handle a URL for each PNG in our response array will considerably reduce the burden of generating new files; we’ll just need to remember to import the requests library to handle it.
We’ll find the code examples we need by clicking on the Python tab below the response model. In this window, we can reveal the client installation command by clicking on the Install Python SDK dropdown. We’ll find that our imports are pre-structured for us, along with snippets for handling API key configuration, API class instantiation, and API response handling.

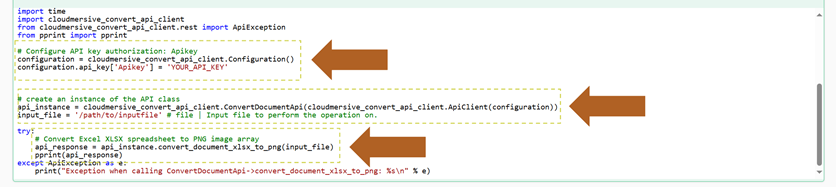
To begin structuring our API request, we’ll copy all this code to our clipboard and paste it in our environment. This code is available below:
pip install cloudmersive-convert-api-client


from __future__ import print_function
import time
import cloudmersive_convert_api_client
from cloudmersive_convert_api_client.rest import ApiException
from pprint import pprint

# Configure API key authorization: Apikey
configuration = cloudmersive_convert_api_client.Configuration()
configuration.api_key['Apikey'] = 'YOUR_API_KEY'


# create an instance of the API class
api_instance = cloudmersive_convert_api_client.ConvertDocumentApi(cloudmersive_convert_api_client.ApiClient(configuration))
input_file = '/path/to/inputfile' # file | Input file to perform the operation on.

try:
    # Convert Excel XLSX spreadsheet to PNG image array
    api_response = api_instance.convert_document_xlsx_to_png(input_file)
    pprint(api_response)
except ApiException as e:
    print("Exception when calling ConvertDocumentApi->convert_document_xlsx_to_png: %s\n" % e)
Structure a Convert API Excel to PNG Request
In this example, we’ve pasted our code in Colab, separated our ```pip install`` command into its own code cell, and run that command to install the client.
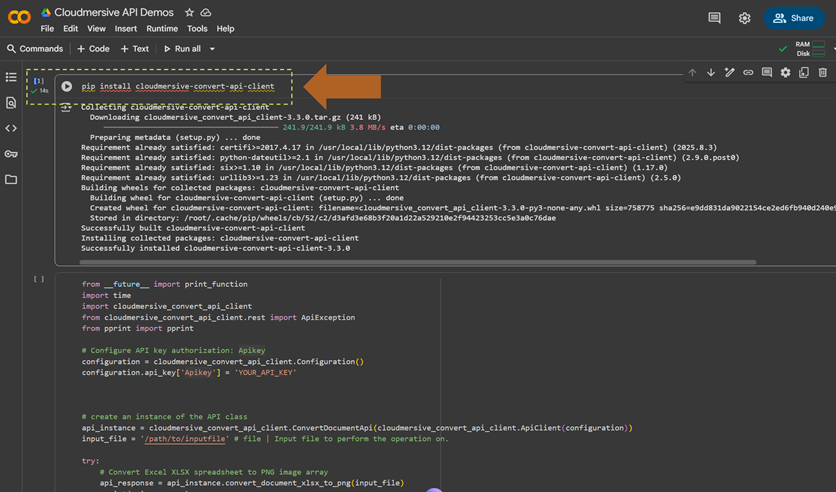
We’ll now make three changes to our code to configure and execute our Excel to PNG array request.
Configuring our API Key
First, we’ll replace the ’YOUR_API_KEY’ placeholder text with our actual Cloudmersive API key. We can find our API key on the API Keys page in our CMP.
In this example workflow, we’ve saved our API Key to the Secrets tab in Colab, and we’ve used the userdata.get() method to set our API key at runtime.
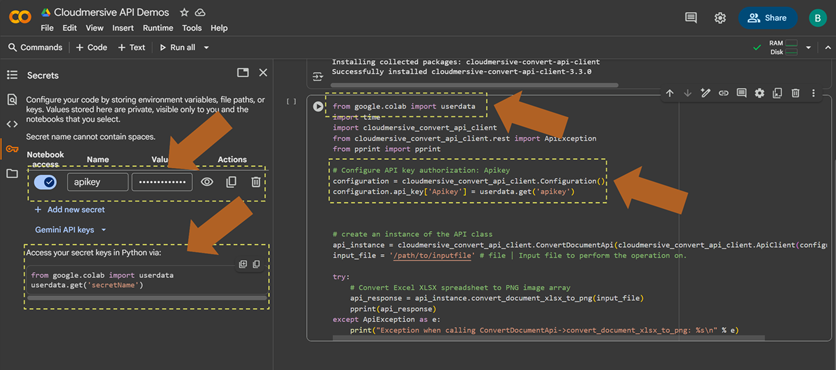
Note that we’ve also removed the from __future__ import print_function import, which isn’t necessary in Python 3.
Configuring our Excel file input
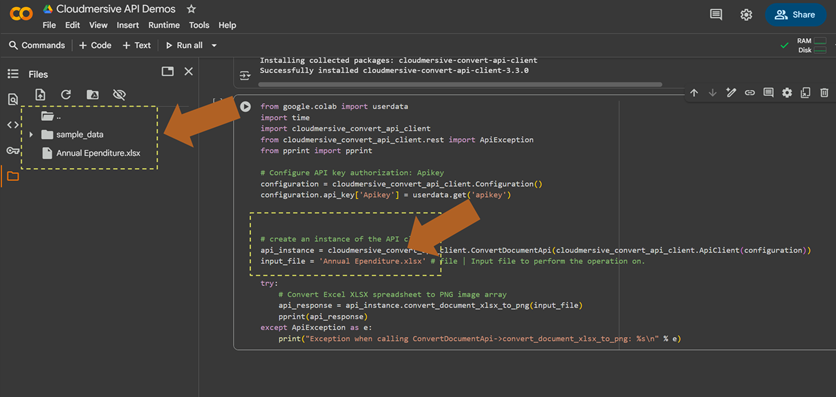
Next, we’ll replace the ’/path/to/inputfile’ placeholder text with an actual Excel file path.
In this example workflow, we’ve uploaded an Excel file with two worksheets on the local path, and we’ve manually replaced the example path with the path to our Excel file.
Generating PNG Files from our API response object
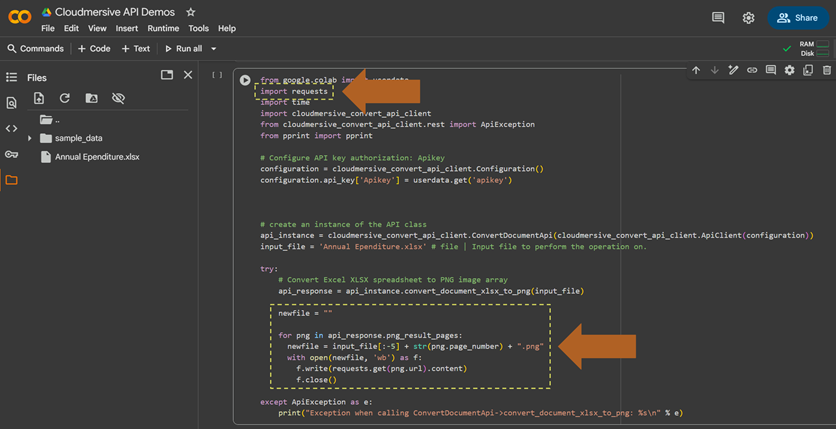
Finally, we’ll remove the pprint(api_response) line in the Try/Except block and replace it with some code that generates new PNG files on our local path. As we recall from reviewing the example API Response on the API Console page, we need to iterate through an array of URLs in our API response and download PNG content from each URL.
To handle this in our example workflow, we’ve added the requests library to our imports, and we’ve then created a simple For Loop which iterates through the png_result_pages attribute of our api_response object directly. We’ve used an empty Str variable to concatenate our original file name (minus the .xlsx extension) with the page_number attribute and a .png extension, and after that, we’ve used the requests.get() method to download PNG file bytes from each URL in our response array.
Reviewing our results
When we run our code in this example workflow, we end up with 3 PNG files from our original 2-worksheet Excel file.
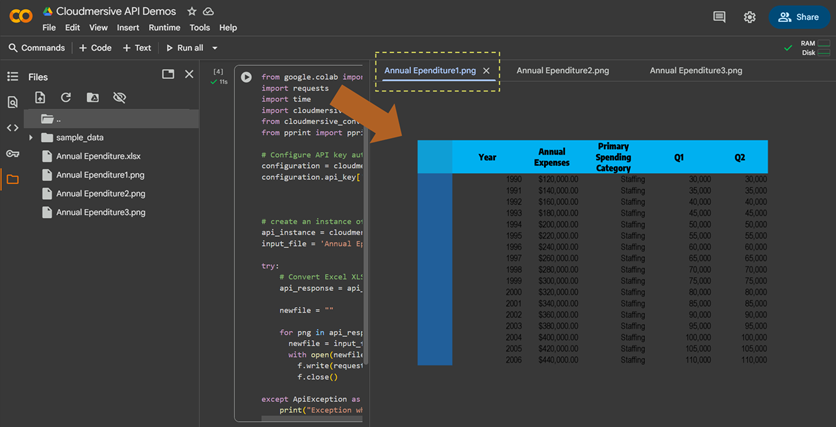

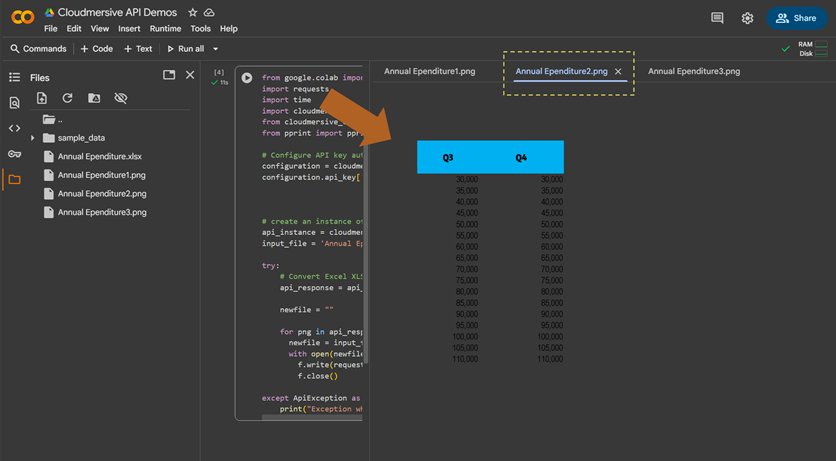
We’ll notice that cells without a styled background come out transparent. We’ll also notice that the number of images we return depends largely on the size of each worksheet in our workbook. In this example workflow, the first worksheet in our example workbook was too wide to fit onto a single PNG while retaining good quality, so the portion that was cut off was returned as its own PNG image.
Conclusion
In this walkthrough, we learned how to take advantage of the Cloudmersive Convert API using ready-to-run code examples from the API Console (Swagger UI) page. We quickly converted a multi-worksheet Excel document to an array of PNG images, and our request only took 11 seconds to complete – despite generating three brand-new files on our local path.
We can take advantage of hundreds of additional APIs on the Cloudmersive API platform following the same basic steps we did above. If you have any questions for our team about implementing Cloudmersive API solutions or scaling them to suit the needs of your enterprise, please do not hesitate to contact a member of our team.


 Technical Articles
 Virus Scan APIs
 Content Disarm and Reconstruction APIs
 Spam Detection APIs
 Document Conversion & Processing APIs
 Document AI APIs
 Natural Language Processing (NLP) APIs
 Optical Character Recognition (OCR) APIs
 Image and Face Recognition and Processing APIs