
In this example, we will convert a Specific Excel Worksheet to PDF in Microsoft Power Automate. You can follow the same steps if you are using Azure Logic Apps.
Our first step in setting up our flow is getting the contents of an XLSX file from Azure Blob (this could be retrieved many other possible file sources as well, such as OneDrive, SharePoint, Box, Google Drive, etc.). We can then take this file and perform the “Split a single Excel XLSX into Separate Worksheets” action in the Cloudmersive Document Conversion Connector. If you are new to using one of our API Keys in Power Automate or Azure Logic Apps, you will be prompted to insert your API Key.
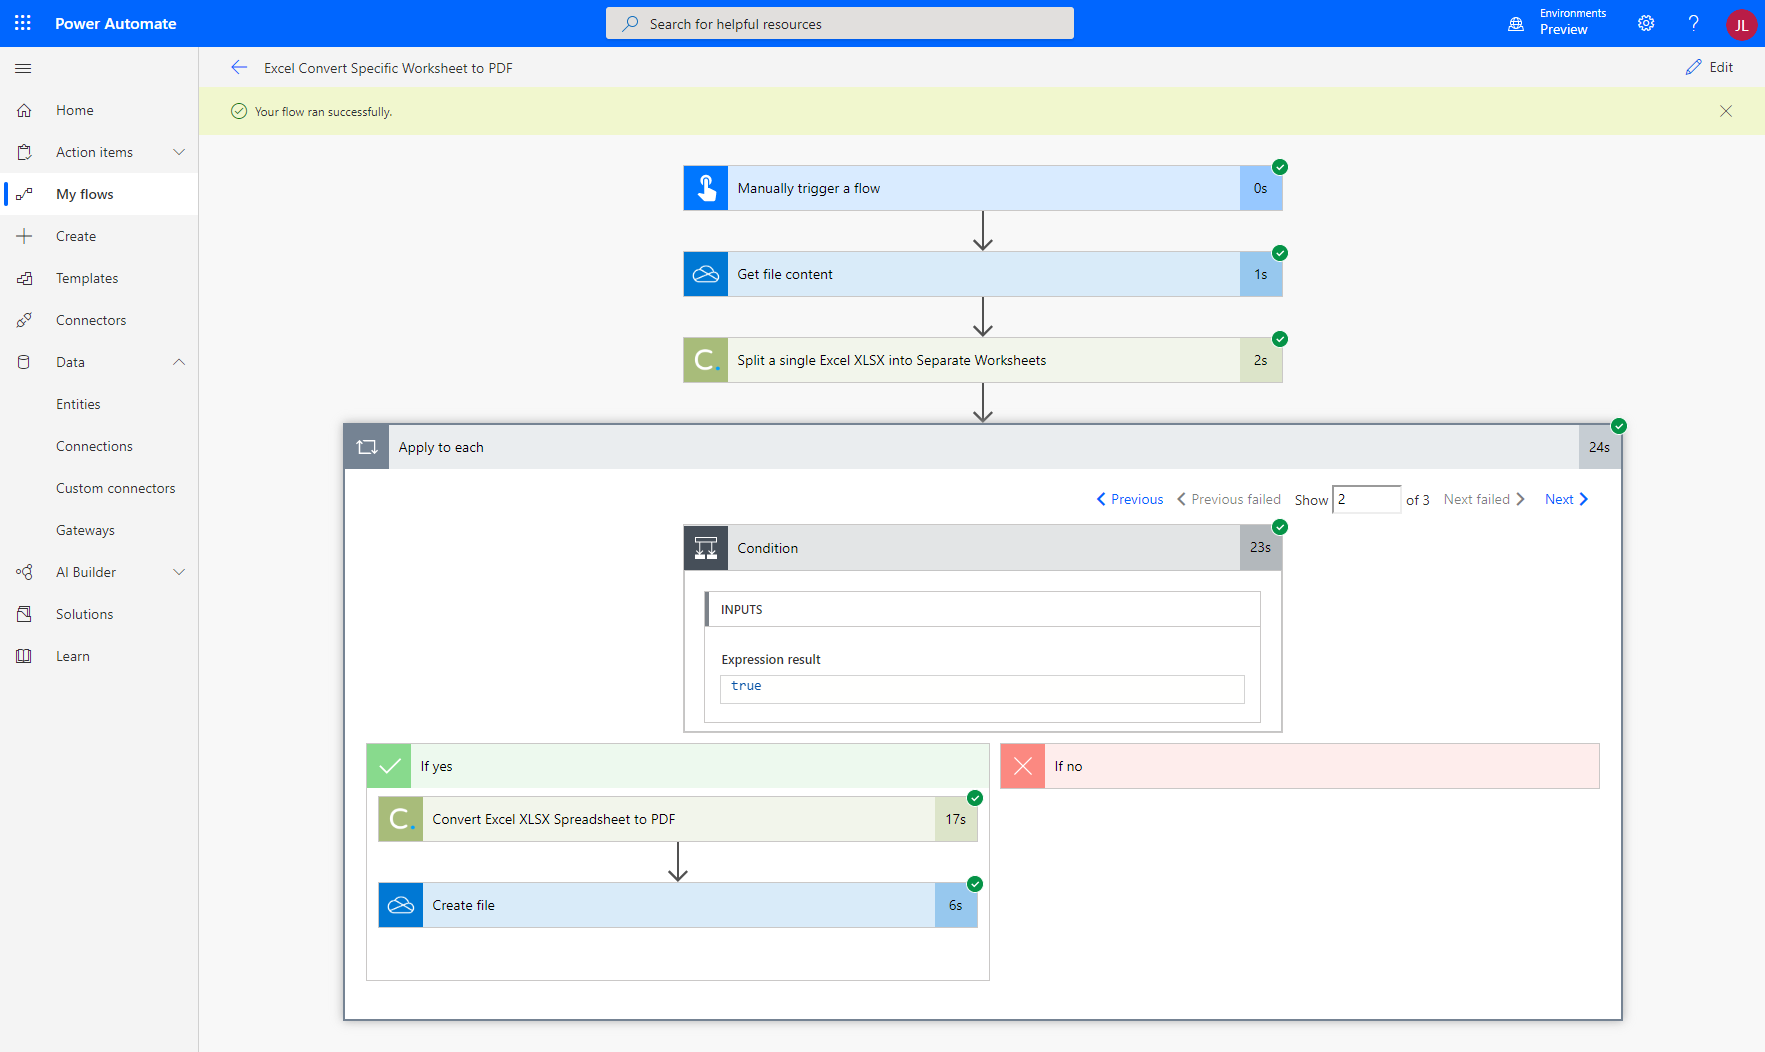
After this step, you will need to plug in the “Apply to Each” control and insert our output from the previous step, “ResultWorksheets”. From here, you can set your Conditions; in this case, we will select “WorksheetNumber” and set it equal to the sheet number for whichever worksheet you would like to convert to PDF. Then, in the “If Yes” option, we will pass the “WorksheetContents” output into the Cloudmersive Document Conversion connector with the “Convert Excel XLSX Spreadsheet to PDF” action, along with the desired file name. After this, we can add a “Create File” connector for OneDrive or other file drive to save our output content.
You can see here how our flow should look once you have followed these steps:

Then, we can run it, and below, you will see the result:
Now, you have an easy to use template for splitting and then converting your Excel worksheets to PDF in Power Automate.
Sign Up Now or 

 Virus Scan APIs
 Content Disarm and Reconstruction APIs
 Spam Detection APIs
 Document Conversion & Processing APIs
 Document AI APIs
 Natural Language Processing (NLP) APIs
 Optical Character Recognition (OCR) APIs
 Image and Face Recognition and Processing APIs